
We’ve all heard of chicken and turkey, but it’s time to give quail its moment in the spotlight. This small bird, often overlooked, packs a punch of flavor that’s hard to match. And what better way to cook it than in an air fryer? It’s quick, it’s easy, and it gives the quail a perfectly crispy exterior while keeping the inside juicy and tender.
Our journey into the world of air fryer quail is not just about trying something new; it’s about discovering a cooking method that transforms a simple bird into a gourmet delight. Whether you’re looking to impress guests or just spice up your weeknight dinner routine, this recipe is sure to become a favorite. So let’s dive in and explore the delicious possibilities that await with our air fryer quail.
Ingredients for Air Fryer Quail
Gathering the right ingredients is the first step to unlocking the delicious potential of cooking quail in an air fryer. Let’s ensure we have everything needed to turn these simple birds into a gourmet experience.
Quail Preparation
- 4 whole quails, cleaned and pat dry
- 2 tablespoons olive oil
- 1 teaspoon salt
- 1/2 teaspoon black pepper
Marinade and Seasoning
For the marinade and seasoning, blending the right herbs and spices will infuse the quail with flavors that are aromatic and enticing.
- 1/4 cup olive oil
- 4 cloves garlic, minced
- 2 tablespoons fresh rosemary, finely chopped
- 2 tablespoons fresh thyme, finely chopped
- 1 tablespoon smoked paprika
- 1 teaspoon ground cumin
- 1 lemon, zest and juice
- Salt and pepper, to taste
Additional Items
To ensure the cooking process goes smoothly, a few additional items are necessary. These elements will help in achieving that perfect cook and presentation.
- Aluminum foil or parchment paper (for easier cleanup)
- Meat thermometer (to ensure the quail is cooked to perfection)
- Serving platter (for presentation)
- Fresh herbs for garnish (optional, but recommended for a gourmet touch)
Tools and Equipment Needed
After you’ve gathered all your ingredients and prepared your flavorful marinade, it’s time to ensure you have all the necessary tools and equipment to bring this delicious air fryer quail to the table. We’ve found that having the right tools can make the cooking process smoother and more enjoyable. Here’s what you’ll need:
- Air Fryer: The star of the show. Ensure it’s the right size to accommodate the number of quail you plan to cook. A capacity of 4 quarts or larger is generally sufficient for 2 to 4 quail.
- Meat Thermometer: Precision is key when cooking quail since their small size means they can easily be overcooked. A meat thermometer will help you ensure the quail are perfectly cooked to a safe internal temperature of 165°F (74°C).
- Mixing Bowls: You’ll need a couple of mixing bowls for preparing the marinade and tossing your quail to evenly coat them.
- Measuring Cups and Spoons: Accuracy in measuring out the marinade ingredients will result in a perfectly balanced flavor.
- Kitchen Tongs: To safely and easily turn the quail during the cooking process without puncturing the meat, which could cause it to dry out.
- Basting Brush: If you choose to apply extra marinade or a glaze to the quail during the cooking process, a basting brush can do this evenly without messing.
- Aluminum Foil or Parchment Paper (Optional): Some prefer to line their air fryer basket to minimize cleanup. If your air fryer manufacturer approves this practice, it could save you some cleaning time.
Before beginning, make sure each tool and piece of equipment is clean and ready to use. Preheating your air fryer for about 3 to 5 minutes at the cooking temperature can help achieve that perfectly crispy exterior right from the start. We always emphasize the importance of safety, so don’t forget to place your air fryer on a heat-resistant surface and keep it away from any overhead cabinets to allow for proper ventilation.
Armed with these tools and your prepared ingredients, you’re ready to embark on the cooking phase.
Preparing the Quail
Before we dive into the cooking process, let’s make sure our quail are perfectly prepped for the air fryer. This preparation phase is crucial for achieving that delightful crispiness and mouthwatering flavor.
Cleaning and Drying
First, let’s begin with cleaning our quail. Rinse each bird under cold running water inside and out. While handling them, check for any remaining feathers or innards that might have been missed and remove them. Once they’re cleaned, it’s time to dry them thoroughly. We’ll use paper towels for this step, patting the exterior and interior of the quail to remove as much moisture as possible. A dry bird will ensure a better marinate adhesion and enhance the crisping process in the air fryer.
Marinating the Quail
On to the flavorful part—marinating the quail. For our marinade, we’ll need:
- 1/4 cup olive oil
- 2 tablespoons fresh lemon juice
- 1 tablespoon minced garlic
- 1 teaspoon dried thyme
- 1 teaspoon dried rosemary
- Salt and pepper to taste
In a mixing bowl, combine olive oil, lemon juice, minced garlic, thyme, rosemary, salt, and pepper. Whisk them together until fully integrated. Place the quail in a resealable plastic bag or a shallow dish, then pour the marinade over the birds. Make sure every bird is evenly coated; this is where we ensure every bite is bursting with flavor. If using a bag, squeeze out as much air as possible before sealing—this helps the marinade envelop the quail more effectively. Let them marinate in the refrigerator, ideally for at least 2 hours, but if you’re short on time, 30 minutes will suffice to impart a baseline of flavor. Remember, the longer the marination, the deeper and more intense the flavors will be in the finished dish.
Preheating the Air Fryer
Before we dive into the cooking process, preheating the air fryer is a crucial step that sets the stage for our gourmet quail adventure. Just as we’ve prepared our ingredients and quail, giving the air fryer a head start enhances the cooking experience, ensuring a perfectly crispy exterior while keeping the interior of the quail succulent.
The Importance of Preheating
Preheating the air fryer does more than just heat the device; it creates an ideal cooking environment that mimics a professional kitchen setting right in our homes. This step is essential for achieving that irresistible crispy skin on our quail without compromising the tenderness inside. It helps in reducing cooking time, making our meal ready sooner and ensuring uniform cooking.
- Power On: Plug in your air fryer and turn it on. Most models have a simple interface, so this step should be straightforward.
- Temperature Setting: Set the temperature to 390°F (199°C). This temperature is ideal for achieving the perfect balance of crispiness and juiciness for our quail.
- Time Setting: Set the time for 3 to 5 minutes. This duration is enough to warm up the air fryer adequately. Some air fryers have a preheat setting, so if yours does, select it and it will automatically adjust the time and temperature for you.
- Waiting Period: While the air fryer preheats, use this time to give the marinated quail a final check. Ensure they’re well-coated and ready for cooking. This is also an excellent time to gather your kitchen tongs and meat thermometer if you haven’t already.
- Ready to Cook: Once the air fryer indicates it’s preheated, carefully place the prepared quail in the basket. Depending on the size of your air fryer, you may need to cook in batches to avoid overcrowding and ensure even cooking.
Arranging Quail in the Air Fryer
Having guided you through the preparation and marination steps to bring out the best flavors in your quail, it’s time we focus on the technique that turns these seasoned birds into a golden crispy delight. Arranging quail in the air fryer is a pivotal step that ensures even cooking and the perfect texture. Let’s dive into the specifics.
Prepping the Air Fryer Basket
Before arranging the quail, make sure your air fryer is preheated and ready to go. If you haven’t already, line the air fryer basket with a piece of aluminum foil or parchment paper for easy cleanup. This step is optional but highly recommended, especially for those who prefer a quicker cleanup post-meal.
Arranging the Quail
Place the marinated quail in the air fryer basket, making sure to space them out evenly. It’s crucial not to overcrowd the basket. Adequate space allows the hot air to circulate freely around each bird, ensuring each quail is cooked uniformly and gets that desirable crispy skin. If cooking multiple quail, you may need to do so in batches depending on the size of your air fryer.
To optimize airflow and encourage even cooking, position the quail breast side down first. This also promotes a juicier outcome, as the backside contains more fat, which will render down during the cooking process, naturally basting the bird.
Monitoring and Flipping
Halfway through the cooking time, carefully open the air fryer and use kitchen tongs to gently flip each quail. This ensures an even crispiness and golden-brown color on all sides. After flipping, continue to cook the quail until they reach a minimum internal temperature of 165°F, checked with a meat thermometer at the thickest part of the bird without touching the bone.
Handling the quail with care and precision at this stage not only ensures safety but also contributes to the appeal and texture of your dish.
Cooking the Quail
Delving into the cooking process, we aim to present a simple yet effective approach to ensure your quail turns out perfectly crisp on the outside and succulently juicy on the inside. Following these steps, you’ll transform your game bird into a culinary masterpiece in no time.
Initial Cooking Stage
Firstly, ensure your air fryer is preheated to 375°F. This step is crucial for achieving that immediate sear on the quail’s skin, locking in flavors and juices from the get-go. Arrange the seasoned quails in a single layer in the air fryer basket, making sure there is a small space between each bird to allow hot air to circulate freely. This ensures each quail cooks evenly and ends up with a beautifully crispy exterior. Cook for 10 minutes before checking on them. During this time, the quail should begin to turn a golden brown, and the rich, savory aromas will start to fill your kitchen, a hint of the delicious meal to come.
Flipping the Quail
After the first 10 minutes, it’s time to flip the quails. This step is essential to ensure even cooking and crispiness on all sides. Use tongs to carefully turn each bird, ensuring not to tear their delicate skin. You’ll notice the underside has begun to crisp up and brown, indicating it’s cooking perfectly. Once flipped, return the basket to the air fryer and continue cooking. This halfway check is also an ideal time to assess if any adjustments are needed, such as repositioning the quails to ensure they’re not too crowded.
Final Cooking Stage
Resume cooking for another 10 minutes, or until the quails reach an internal temperature of 165°F. It’s important to use a meat thermometer to check this, inserting it into the thickest part of the bird without touching the bone. Once they’ve reached the safe and optimal temperature, remove the quails from the air fryer and let them rest for a few minutes on a wire rack. This brief resting period allows the juices to redistribute throughout the meat, ensuring each bite is moist and flavorful. After resting, your air fryer quail is ready to serve. They should be golden, crispy, and irresistibly tempting, with a tenderness inside that makes this dish a true delight.
Serving Suggestions
After mastering the art of cooking quail in an air fryer, the next step is to present and serve this gourmet delight in a way that complements its flavors and crispy texture. Let’s dive into some serving suggestions that promise to elevate this dish to the next level.
Garnishes and Accompaniments
Choosing the right garnishes and accompaniments can transform air fryer quail from a simple meal to a refined dining experience. Here’s what we recommend:
- Fresh Herbs: Sprinkle freshly chopped herbs such as rosemary, thyme, or parsley over the cooked quail for a burst of freshness and color.
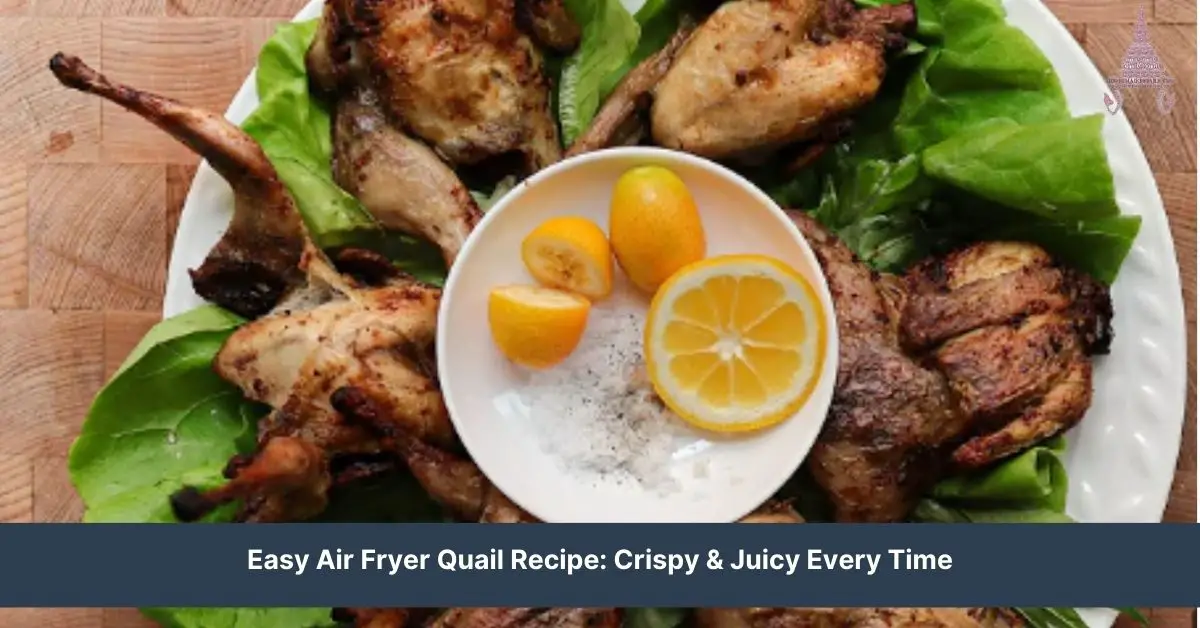
- Citrus Wedges: Serve with wedges of lemon or lime on the side. A squeeze of citrus juice adds a zesty contrast to the richness of the quail.
- Grilled Vegetables: Pair the quail with a side of grilled vegetables like asparagus, bell peppers, or zucchini for a balanced meal.
- Sauces and Dips: A light mustard sauce or a cherry glaze can complement the quail beautifully. For a touch of luxury, consider serving it with a side of truffle aioli.
- Wine Pairing: A glass of medium-bodied red wine, such as Pinot Noir, enhances the flavors of the quail perfectly.
Presentation Tips
The presentation is key to making your air fryer quail truly stand out. We’ve gathered some tips to help showcase your culinary creation:
- Plating: Use a warm, neutral-colored plate to make the golden-brown hues of the quail pop. Position the quail at the center of the plate for a visually appealing presentation.
- Height: Stack the accompaniments slightly under or beside the quail to add height and depth to your dish. This technique draws the eye and makes the dish more enticing.
- Color Contrast: Integrate elements of contrasting colors through your garnishes and sides. Brightly colored vegetables or a drizzle of vibrant sauce can make the dish visually striking.
- Minimalism: Remember, less is more. Avoid overcrowding the plate to let each component of the dish shine individually.
- Serving Utensils: Provide appropriate serving utensils for both the quail and the sides. Elegant cutlery adds to the overall dining experience.
Make-Ahead Instructions
In our culinary journey, we’ve found that preparation is key to a delightful meal, especially when it comes to a sophisticated dish like air fryer quail. To ensure a seamless cooking experience and to fully enjoy the crispy exterior and juicy interior that makes this bird a gourmet delight, we’ve laid out some make-ahead instructions.
Marinating the Quail
First up, let’s talk about marinating. Marinating the quail not only infuses it with robust flavors but also tenderizes the meat, ensuring that every bite is succulent. We recommend preparing your marinade a day in advance. Blend together your choice of herbs, oils, and seasonings—a combination of olive oil, garlic, rosemary, and lemon zest works wonders. Submerge the quail in the marinade, ensuring each bird is well-coated, then cover and refrigerate overnight. This step guarantees that the quail will soak up all those delightful flavors, giving you a head start on the cooking process the next day.
Preparing Accompaniments
While the quail is marinating, take the opportunity to prepare any sides or garnishes. Grilled vegetables, for instance, can be prepped by washing, slicing, and storing them in the fridge. If you’re planning to serve the quail with a sauce, consider making it ahead as well. Sauces often taste better the next day after the flavors have had a chance to meld. Simply store the sauce in an airtight container in the refrigerator.
Setting the Scene
Lastly, think about the presentation. The visual appeal of your dish is nearly as important as the taste. Choose your serving plates, utensils, and any additional decor for your dining table. Assess if you’ll be using fresh herbs or citrus wedges as garnishes and have those prepped and ready to go. By deciding on these elements beforehand, you’ll save time and reduce stress, allowing you to focus on perfectly cooking the quail in the air fryer.
Storing and Reheating
After indulging in the delightful crunch and succulent interior of air fryer quail, you might find yourself with leftovers. No worries—we’ve got you covered on the best practices for storing and reheating your quail so you can enjoy it almost as much as you did when it was freshly made.
Storing Leftover Quail
- Cool Down: Allow the quail to cool to room temperature for no longer than two hours. This minimizes the risk of bacterial growth.
- Refrigerate Properly: Transfer the cooled quail into an airtight container. If you have it, use shallow containers to help the quail cool down more uniformly while in the fridge.
- Label and Date: It’s easy to forget when we stored our leftovers, so make sure to label the container with the date. Air fryer quail can be safely stored in the refrigerator for up to 3-4 days.
Reheating Your Quail
Reheating quail in the air fryer helps keep the skin crispy while ensuring the inside stays juicy. Here’s how to do it:
- Preheat the Air Fryer: Set your air fryer to 350°F (175°C) for about 3-5 minutes. This ensures a consistent heating environment for your quail.
- Arrange for Even Heating: Place the leftover quail in the air fryer basket. Make sure they’re not overlapping to promote even reheating.
- Reheat with Care: Heat the quail for 3-4 minutes, then flip each piece over and heat for another 2-3 minutes. The goal here is to ensure the quail reaches an internal temperature of 165°F (74°C), making it safe to eat while preserving its delicious texture and flavor.
- Check for Doneness: Use a meat thermometer to check if the quail has reached the recommended internal temperature. If not, keep reheating in 1-minute increments until it does.
Conclusion
We’ve journeyed through the art of cooking quail in an air fryer from start to finish. It’s not just about achieving that perfect crispy exterior and juicy interior; it’s about transforming a simple meal into a gourmet experience right in our kitchens. We’ve covered everything from the initial prep to the final presentation and even how to handle leftovers with care.
Let’s not forget the joy of experimenting with flavors and accompaniments that elevate our air fryer quail. Whether it’s a special occasion or a desire to spice up our daily meals, this method offers a delightful culinary adventure.
So let’s gather our ingredients, preheat our air fryers, and embark on this flavorful journey together. Here’s to many more delicious experiences with our trusty air fryer by our side!
Related Posts:
- Easy Air Fryer Quail Recipe: Crispy & Juicy Every Time
- Easy Bánh Chuối Hấp Recipe: Perfect Steamed Banana Cake
- Ultimate Chao Bo Recipe: Savory Vietnamese Beef Porridge Guide
- Easy Instant Pot Chao Ga Recipe: Vietnamese Comfort Food
- Ultimate Fuchka Recipe: Spice-Filled Potato Delight & Serving Tips
- Ultimate Guide to Red Snapper Collar: Sustainability & Recipes