
We’ve all reached for that bottle of fiery, tangy sriracha sauce at some point, haven’t we? It’s become a staple in kitchens worldwide, known for its vibrant red color and the perfect balance of heat and garlic. But have you ever thought about making it at home? Trust us, it’s easier than you might think, and the flavor payoff is absolutely worth it.
Making your own sriracha sauce not only allows you to adjust the spiciness to your liking but also gives you the opportunity to experiment with different ingredients, making your version truly unique. Whether you’re a die-hard fan of this beloved condiment or just looking to dip your toes into the world of homemade sauces, we’re here to guide you through every step. Let’s embark on this spicy adventure together and elevate our meals with a bottle of homemade sriracha that’s packed with flavor and love.
Ingredients
Embarking on the journey of making homemade sriracha sauce is both exciting and straightforward. Below, we’ve organized the essential ingredients you’ll need, as well as some optional add-ins to customize your sauce to perfection.
Fresh Produce
- 1 pound of fresh red jalapeño peppers, stems removed and chopped
- 6 cloves of garlic, peeled
Pantry Items
- 3 tablespoons of white sugar
- 1 tablespoon of Kosher salt
- ½ cup of distilled white vinegar
- 2 tablespoons of water
- Optional: 1 tablespoon of fish sauce for an authentic taste
Optional Add-Ins
To tailor your homemade sriracha to your palate, feel free to experiment with these optional add-ins. A teaspoon of smoked paprika can add a deep, smoky flavor, while a few tablespoons of tomato paste will mellow out the fire and add a hint of sweetness. If you’re looking for a sauce with a bit more complexity, a tablespoon of honey or brown sugar can provide a delightful balance to the heat.
Equipment Needed
After selecting your preferred ingredients to customize your homemade sriracha sauce, it’s time to gather the necessary equipment to bring this flavorful condiment to life. We’ve compiled a list of tools and appliances you’ll need for a smooth and efficient cooking process. Let’s dive in!
Food Processor or Blender
First up, you’ll need a food processor or a high-powered blender. This is crucial for blending the red jalapeño peppers, garlic, and other ingredients into a smooth paste. If you’re aiming for a finer texture, a high-powered blender might be your best bet.
Knife and Cutting Board
A sharp knife and a sturdy cutting board are essential for prepping your ingredients. You’ll be chopping the peppers and garlic, so make sure your knife is sharp enough to make clean cuts, which helps in preserving the flavors and ensuring even cooking.
Measuring Cups and Spoons
Accuracy is key when it comes to making your homemade sriracha sauce. Measuring cups and spoons will help you measure out the sugar, salt, vinegar, and any optional add-ins precisely. This ensures a balanced flavor profile in the final product.
Saucepan
You’ll need a medium-sized saucepan to cook the sauce mixture. This step is important for melding the flavors together and achieving the desired consistency. A saucepan with a heavy bottom is preferred, as it distributes heat more evenly and reduces the risk of burning the sauce.
Strainer or Sieve
After cooking, you’ll want to strain the sauce to remove any seeds or large bits that didn’t blend thoroughly. A fine-mesh strainer or sieve is perfect for this job, as it will give you a smooth, consistent sauce without losing too much of the pulp.
Sterilized Jars or Bottles
Finally, to store your homemade sriracha sauce, you’ll need sterilized jars or bottles. Proper sterilization is crucial to prevent bacteria growth and ensure your sauce stays fresh for as long as possible. Glass jars or bottles with tight-fitting lids are ideal choices.
Prep Work
Before we dive into creating our vibrant homemade sriracha sauce, let’s set ourselves up for success with some essential prep work. This step ensures a smoother cooking process, allowing us to focus on the flavors and textures that make this sauce uniquely ours.
Washing and Cutting
First, we’ll start with the fresh red jalapeño peppers, the heart of our sriracha sauce. Rinse them under cold water to remove any dirt or pesticides, gently patting them dry with a clean towel. Next, wearing gloves to protect our hands from the heat, we’ll slice off the stems and cut the peppers into half-inch pieces. Don’t worry about removing the seeds; they add to the heat and depth of our sauce.
For the garlic, peel the cloves and give them a rough chop. The pieces don’t have to be perfect since they’ll be blended later, but breaking them down helps release their potent flavors into the sauce more evenly.
Measuring Ingredients
Accuracy is key in crafting the perfect homemade sriracha, so let’s get our measuring cups and spoons ready. We’ll need the following amounts:
- Fresh red jalapeño peppers, coarsely chopped, to fill about 1 cup
- 4 cloves of garlic, roughly chopped
- 2 tablespoons of sugar (feel free to adjust this according to your taste or replace it with honey or brown sugar for a different flavor profile)
- 1 tablespoon of salt (this can be adjusted based on preference or dietary needs)
- 3 tablespoons of vinegar (white or apple cider vinegar works great here)
For those of us wanting to customize our sriracha sauce further, now is the time to measure out any optional add-ins like fish sauce for umami, smoked paprika for a hint of smoke, or tomato paste for a thicker consistency and deeper color.
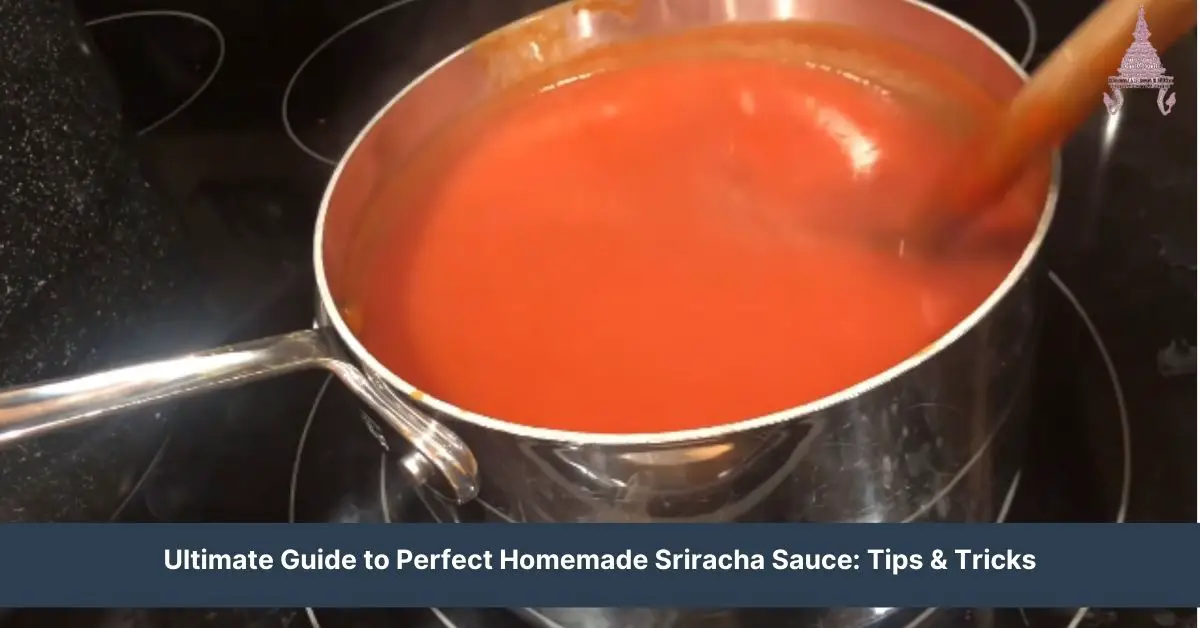
Cooking Process
Now that we’ve prepped our ingredients and discussed the beauty of customizing our own spicy creation, let’s dive into the cooking process. This is where the magic happens, transforming our fresh ingredients into that vibrant, fiery sriracha sauce we’re all craving.
Simmering the Peppers and Garlic
First up, let’s get those peppers and garlic simmering. Here’s how we do it:
- Combine the chopped red jalapeño peppers, garlic, brown sugar, vinegar, and salt in a medium saucepan. If you’re including any optional add-ins like fish sauce, smoked paprika, or tomato paste, now’s the time to throw those in as well.
- Bring the mixture to a boil over medium-high heat, then reduce the heat to low. Let it simmer gently for about 10-15 minutes. You’re looking for the ingredients to soften and meld together, creating a base that’s rich in flavor.
- Stir occasionally to make sure everything is cooking evenly and nothing sticks to the bottom of the pan.
During this step, your kitchen will start to fill with the tangy aroma of cooking peppers and garlic – a sure sign that something delicious is underway.
Blending the Mixture
Once our pepper mixture is nicely simmered and the ingredients are soft, it’s time to blend:
- Carefully transfer the mixture to a blender. Remember, it’s hot, so handle with care.
- Secure the lid tight – you don’t want hot sauce splattering all over – and blend the mixture until it’s completely smooth. This usually takes about 1-2 minutes, depending on your blender’s power.
- If the sauce seems too thick, you can add a little water, one tablespoon at a time, until you reach your desired consistency.
This blending step is crucial for achieving that silky smooth texture that makes sriracha so irresistibly spreadable.
Straining the Sauce
Finally, to ensure our sriracha is perfectly smooth, we’ll strain it:
- Place a fine-mesh strainer over a bowl. Pour the blended mixture through the strainer.
- Use a spatula or spoon to press the mixture through, extracting as much liquid as possible. You’ll be left with the solid bits in the strainer and a smooth sauce in the bowl.
- Discard the solids. Your sriracha sauce is now ready to be bottled and enjoyed.
Straining might seem like an extra step, but it’s the key to that velvety texture that clings so beautifully to your favorite dishes.
Fermentation
After transforming our fresh ingredients into a vibrant sriracha blend, the next pivotal step is fermentation. This process not only develops the sauce’s depth and complexity but also its distinct tangy flavor.
Setting Up the Fermentation
To start, transfer the blended mixture into a glass jar, leaving about an inch of space at the top. This space is crucial for the gases produced during fermentation. We then stir in 1 tablespoon of sea salt per cup of sauce to encourage the growth of beneficial bacteria while inhibiting unwanted ones. After mixing thoroughly, cover the jar with a cheesecloth or a breathable fabric, securing it with a rubber band or a string. This covering protects our sauce from dust and insects while allowing air, essential for fermentation, to circulate.
Place the jar in a dark, room-temperature spot where it can sit undisturbed. Ideal temperatures for fermentation range from 60°F to 75°F. If your kitchen is on the cooler side, wrapping the jar in a towel might help maintain a more consistent temperature.
Monitoring Fermentation Progress
Monitoring the fermentation process is both exciting and crucial. Each day, we need to check the jar for signs of fermentation, such as bubbles forming along the sides or surface of the sauce. This bubbling is a clear indicator that fermentation is actively happening, thanks to the work of our microscopic friends, lactic acid bacteria.
It’s also important to stir the sauce daily. This not only prevents mold formation on the surface but also helps distribute the bacteria evenly throughout the sauce, ensuring a uniform fermentation process. You’ll notice the sauce’s color may darken slightly, and its scent will become more pronounced and tangy as fermentation progresses.
Taste test the sauce every few days. We’re looking for a balance between spice, sweetness, and acidity. The fermentation process can take anywhere from 5 to 7 days, but depending on your taste, it could be shorter or longer. Once the desired flavor profile is reached, remove the cloth, seal the jar with a lid, and place it in the refrigerator to slow down fermentation and preserve the sauce.
Finishing the Sauce
After days of fermentation, we’re finally at the last stretch to perfect our homemade sriracha sauce. This part is all about fine-tuning to achieve that silky finish and the ideal balance of flavors we love in a sriracha.
Adjusting Consistency
Our first task is to review the sauce’s consistency. We aim for a smooth, pourable texture, similar to what you’d find with store-bought sriracha, but with our own personal touch. If the sauce appears too thick, we’ll thin it out by stirring in a bit of distilled vinegar. We add the vinegar a tablespoon at a time, blending after each addition, until we hit the perfect viscosity. Not only does the vinegar help with the consistency, but it also brings an extra tang that beautifully complements the fiery, fermented flavors of the peppers.
Seasoning to Taste
Now it’s time to season our sauce to perfection. We begin with a taste test: we’re looking for a fiery kick, a pronounced tang, and a hint of sweetness. If our sauce needs more heat, we might add a pinch of extra ground chili or even a dash of cayenne. For sweetness, a bit more sugar can be dissolved into the mix. And if it requires additional tang, another splash of vinegar will do the trick.
Remember, the key here is gradual adjustments: we add small amounts, blend, and taste. It’s easier to add more than to fix an overly seasoned sauce. Plus, this step is where we can truly customize the sauce to our liking, making our homemade sriracha uniquely ours.
Once we’re satisfied with the consistency and flavor, our homemade sriracha is complete. It’s ready to be bottled and enjoyed on everything from eggs to noodles, adding a personal touch of heat and flavor to our favorite dishes.
Storage and Shelf Life
After achieving the perfect balance of heat, tang, and sweetness in our homemade sriracha sauce, it’s important to store it properly to maintain its quality and extend its shelf life.
Bottling the Sauce
Once our sriracha sauce has reached its ideal flavor and consistency, we move on to bottling it. We always opt for clean, sterilized glass bottles or jars to prevent any contamination that could spoil the sauce. Using a funnel, we carefully pour the sauce into the bottles, leaving about half an inch of space from the top to allow for expansion. We then seal the bottles tightly with a lid to keep out air and potential contaminants. It’s a simple yet crucial step to ensure our sriracha remains fresh and delicious.
Refrigeration and Usage
To preserve the fiery flavor and tangy goodness of our homemade sriracha sauce, refrigeration is key. Properly stored in the refrigerator, our sriracha can last for up to 6 months, sometimes even longer if not exposed to frequent temperature changes. We recommend labeling the bottles with the date of bottling to keep track of their shelf life. As for usage, our sriracha sauce is incredibly versatile. Whether it’s adding a spicy kick to soups and noodles, spicing up breakfast eggs, or as a fiery dip for snacks, its rich flavor enhances just about any dish. Remember, a little goes a long way, so start with a small amount and adjust according to taste.
Serving Suggestions
Now that our homemade sriracha sauce is ready, let’s explore the myriad ways to enjoy this versatile condiment. Whether you’re aiming for a classic pairing or looking to get creative, sriracha adds a delightful kick to any dish.
Classic Pairings
Sriracha shines brightest when paired with foods that benefit from its spicy, garlicky, and slightly sweet profile. Here are some classic combinations we absolutely love:
- Eggs: A drizzle over scrambled eggs, omelets, or a sunny-side-up can elevate your breakfast to a new level of deliciousness.
- Soups and Stews: Just a spoonful stirred into your favorite soup or stew adds a beautiful depth of flavor.
- Noodles and Pasta: Whether it’s a simple garlic pasta or a bowl of ramen, a squeeze of sriracha can introduce a wonderful heat.
- Pizza: For those who enjoy a spicy kick, adding sriracha on top of pizza is a game-changer.
- Burgers and Hot Dogs: A bit of sriracha mixed into ketchup or mayonnaise creates the perfect spicy condiment for any grilled dish.
Creative Uses
Looking to experiment with sriracha beyond the classics? Here are some unique ways to incorporate this hot sauce into your culinary repertoire:
- Sriracha-Infused Honey: Combine equal parts sriracha and honey for a spicy-sweet glaze perfect for drizzling over fried chicken or roasted vegetables.
- Spicy Cocktails: A dash of sriracha can add an interesting twist to a Bloody Mary or a michelada, offering a zesty kick.
- Popsicles: For a bold dessert, mix sriracha with fruit juice or puree for a spicy, frozen treat.
- Peanut Butter Sandwich: Add a small amount to a peanut butter sandwich for an unexpectedly delightful combination.
- Ice Cream: For the adventurous palate, a light drizzle of sriracha over vanilla ice cream can be surprisingly harmonious, providing a balance of cool sweetness with heat.
Tips for a Perfect Homemade Sriracha Sauce
Crafting the perfect homemade sriracha sauce is both an art and a science. After exploring how to make, customize, and serve this fiery condiment, let’s dive into some essential tips to elevate your sriracha game. These tricks will ensure your sauce hits all the right notes of flavor, texture, and heat.
Select the Right Peppers
The heart of any sriracha sauce is its chilies. For a balance of heat and flavor, we recommend using fresh red jalapeños or Fresno peppers. These peppers offer a moderate spice level that’s perfect for a sriracha sauce. Remember, the ripeness of the pepper influences the sauce’s final heat level and sweetness, so opt for peppers that are bright red and firm to the touch.
Focus on Fermentation
Fermentation is key to developing the unique tang and depth in sriracha. Allow your pepper mixture to ferment for at least 3–5 days in a cool, dark place. This process not only builds flavor but also intensifies the sauce’s natural umami qualities. For those eager to experiment, extending the fermentation period to 7 days can enhance the complexity of the sauce.
Balance Your Flavors
Achieving the right balance of sweet, sour, salty, and spicy is crucial. Start with the foundational recipe, then adjust according to your taste preferences. If your sauce is too spicy, introduce a bit more sugar to mellow the heat. For extra tanginess, a slight increase in vinegar can make all the difference. This balancing act is what makes homemade sriracha truly special and personalized.
Achieve the Perfect Texture
For a smooth sriracha sauce, blending and straining are vital steps. After fermentation, blend your mixture until completely smooth, then strain it to remove any seeds and skins. This creates a silky, pourable sauce. If you prefer a bit more texture in your sriracha, simply blend a little less or skip the straining step.
Bottle Properly for Longevity
Storage plays a big role in maintaining the freshness and vibrancy of your sriracha. Transfer your finished sauce into clean, sterilized bottles. Keeping the bottles in the refrigerator extends the shelf life of your sriracha, ensuring it stays fresh and flavorful for months. Always use a clean spoon or squeeze the bottle carefully to avoid introducing bacteria into the sauce.
Conclusion
We’ve walked through the journey of making homemade sriracha sauce together, from selecting the freshest peppers to bottling up the fiery goodness. It’s clear that a little effort goes a long way in creating a condiment that’s not just a sauce but a labor of love. So, let’s embrace the process, experiment with our batches, and enjoy the unique taste of homemade sriracha that can’t be found on any store shelf. Here’s to spicing up our meals and our lives with a sauce that’s truly ours.
Related Posts:
- Ultimate Guide: How to Boil Balut for Rich Flavor & Texture
- Easy Bun Bo Hue Instant Pot Recipe: Authentic Flavors at Home
- Ultimate Guide to Making and Enjoying Banh It La Gai at Home
- Ultimate Guide to Perfect Ca Nuong Da Gion: Marinade to Leftovers
- Easy Chanh Muoi Recipe: How to Make Salted Lemonade at Home
- Ultimate Hong Kong Macaroni Soup Guide: Preparation to Storage
- Ultimate Guide to Perfect Homemade Sriracha Sauce: Tips & Tricks
- Ultimate Mì Hoành Thánh Xá Xíu Guide: Prep, Serve, Store
- Pad Phet Gai: A Spicy Thai Chicken Recipe, Storage, and Reheating Guide
- Juicy Toyomansi Pork Chops: Recipe & Serving Tips
- Ultimate Guide to Vietnamese Baked Catfish: Marinating, Cooking, & Serving
- Ultimate Vietnamese Mayonnaise Banh Mi Recipe & Pairing Guide
