
We’ve always been fascinated by the flavors of Vietnam, a country where every dish tells a story. Today, we’re diving into a lesser-known but utterly delightful recipe, Chả Ốc. This dish, with its unique blend of ground snails, pork, and aromatic herbs wrapped in banana leaves, offers a taste of Vietnam’s rich culinary heritage right in our kitchen.
Let’s embark on this culinary journey together, bringing a piece of Vietnam into our homes with every bite of Chả Ốc. Trust us, it’s an experience you won’t want to miss.
Ingredients for Cha Oc
As we dive further into the depths of Vietnamese culinary tradition, let’s gather the ingredients for our Chả Ốc. This list will ensure you have everything needed to bring the rich flavors and unique texture of this dish to your kitchen.
Cha Oc Meat Mixture
- 1 pound (450g) of fresh snails, cleaned and minced
- 1/2 pound (225g) of ground pork
- 3 tablespoons of fish sauce
- 2 tablespoons of minced shallots
- 1 tablespoon of minced garlic
- 1 teaspoon of sugar
- 1/4 teaspoon of black pepper
- 2 tablespoons of cornstarch or tapioca flour, to bind the mixture
Aromatic Herb Selection
Gathering the right herbs is essential for achieving the signature flavor profile of Chả Ốc.
- 1/2 cup of chopped Vietnamese coriander (rau răm)
- 1/4 cup of finely chopped lemongrass
- 1/4 cup of chopped mint
- 2 tablespoons of chopped green onion
These herbs not only infuse the meat mixture with freshness but also introduce layers of flavors that are quintessentially Vietnamese.
Additional Garnishes and Dipping Sauce
To elevate the Chả Ốc experience, we complement the dish with garnishes and a homemade dipping sauce that highlight its exotic taste.
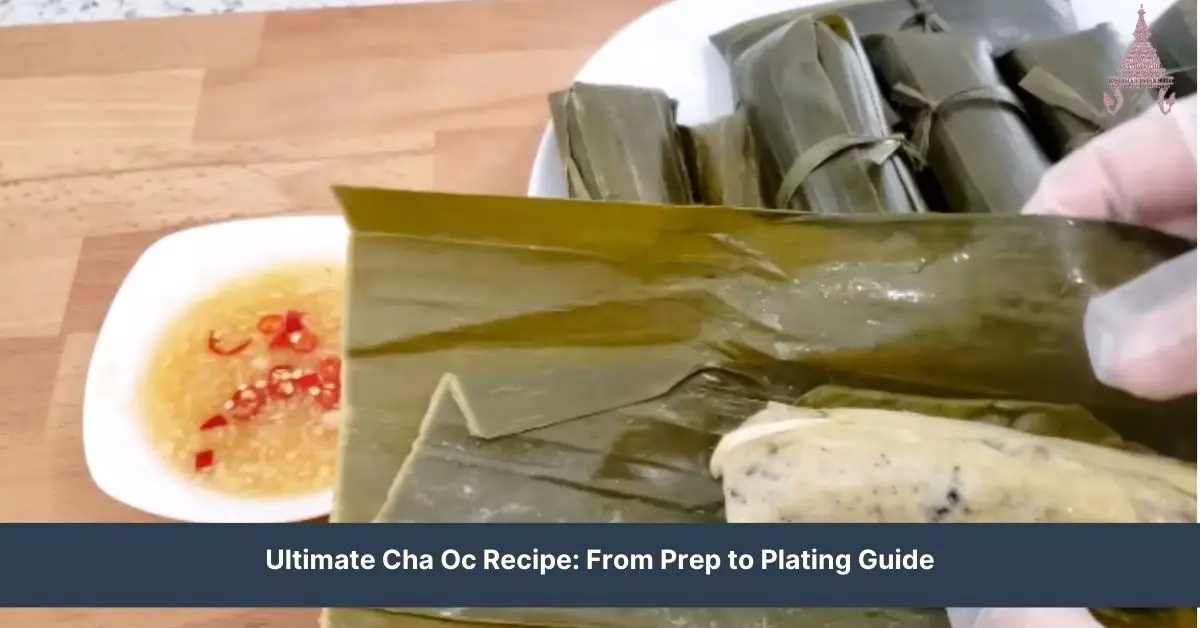
- Banana leaves, for wrapping
- Fresh lettuce leaves, for serving
- Cucumber slices and pickled carrots, for garnish
- Crushed peanuts, for garnish
- 1/4 cup of fish sauce
- 2 tablespoons of lime juice
- 1 tablespoon of sugar
- 1/2 cup of water
- 1 clove of garlic, minced
- 2 Thai chilies, finely chopped
The combination of these fresh and pickled garnishes with the spicy, tangy dipping sauce creates a balance of textures and flavors, enhancing the overall enjoyment of Chả Ốc.
Tools and Equipment Needed
To bring the vibrant flavors of Chả Ốc to life, it’s essential we have the right tools and equipment on hand. Let’s get our kitchen ready for this Vietnamese culinary adventure!
Kitchen Appliances
- Food Processor: A must-have for finely chopping the snails and pork, ensuring they blend seamlessly with the aromatic herbs.
- Steaming Setup: Whether it’s a traditional steamer or a makeshift setup using a pot and steamer basket, steaming is crucial for cooking the Chả Ốc wrapped in banana leaves.
- Grill or Broiler: For those who prefer a charred finish, a grill or broiler will be used to add a smoky flavor to the Chả Ốc, enhancing its aroma and taste.
- Refrigerator: Essential for marinating the meat mixture and chilling the dipping sauce to meld the flavors.
- Sharp Knife: We’ll need a sharp knife for finely mincing the herbs and for cutting the banana leaves into the right sizes for wrapping.
- Mixing Bowls: Various sizes are required for mixing the meat and snail mixture, preparing the dipping sauce, and combining the herbs and garnishes.
- Measuring Cups and Spoons: Accuracy is key, so we’ll use these to measure out the seasonings, sauces, and other ingredients precisely.
- Mortar and Pestle: Ideal for grinding fresh spices or making a paste from the lemongrass, which will infuse our Chả Ốc with authentic Vietnamese flavors.
- Tongs and Spatulas: These will come in handy for handling and flipping the Chả Ốc during the steaming or grilling process, ensuring they cook evenly.
- Brush: A brush is essential for spreading oil on the banana leaves or applying a glaze to the Chả Ốc, if desired.
Prep Work
Before we dive into the heart of making Chả Ốc, let’s tackle the essential prep work. This will set us up for a smoother cooking process, ensuring all our ingredients are ready to shine in this traditional Vietnamese dish.
Cleaning and Preparing Snails
The foundation of any good Chả Ốc starts with properly prepared snails. First, give the snails a thorough rinse under cold running water. This step is crucial to remove any dirt or grit. Then, soak the snails in a bowl of salted water for about 1 hour. This soaking process helps to draw out any remaining impurities. After soaking, rinse the snails again under cold water and set them aside to drain. To extract the meat, use a small fork or a snail extractor tool, carefully removing the meat from the shells. Finally, give the snail meat one last rinse and chop it coarsely. Our snails are now clean and ready for the next step.
Chopping and Blending Herbs
Fresh herbs are what give Chả Ốc its distinctive aroma and flavor—chop herbs such as lemongrass, Thai basil, and cilantro. You’ll need about a cup of each. Once chopped, add the herbs to a food processor along with minced garlic and shallots. Pulse until you achieve a finely minced mixture. This herb blend will infuse our Chả Ốc with its classic Vietnamese flavors. If a food processor is not available, a mortar and pestle will work just fine, although it might require a bit more elbow grease.
Making the Dipping Sauce
A fantastic dipping sauce can elevate Chả Ốc from good to unforgettable. For our sauce, mix together 4 tablespoons of fish sauce, 2 tablespoons of sugar, 2 tablespoons of lime juice, and ½ cup of warm water until the sugar is fully dissolved. Then, add minced garlic and chopped chili to taste for that quintessential Vietnamese kick. The sauce should have a perfect balance of sweet, sour, savory, and spicy. Adjust the flavors as needed to suit your preferences. The dipping sauce is not just a side; it’s an integral part of the Chả Ốc experience, bringing all the dish’s elements together harmoniously.
Making the Cha Oc Batter
Following the detailed preparation of snail meat and aromatic herbs, the next critical step in crafting an authentic Chả Ốc involves creating the perfect batter. This batter is what binds our ingredients together, infusing them with flavor and ensuring a delectable taste and texture in every bite.
Mixing the Ingredients
To begin, we’ll need to blend our prepared snail meat with some finely minced pork. Here’s how we do it:
- In a large bowl, combine 200g of snail meat and 300g of minced pork. It’s crucial that both are at a similar mince level to ensure a uniform mix.
- Add 2 tablespoons of finely chopped lemongrass, 1 tablespoon of chopped Thai basil, and 1 tablespoon of chopped cilantro to the bowl. These herbs will introduce a fresh and vibrant flavor profile to the batter.
- For the binding mix, whisk together 1 large egg and 2 tablespoons of rice flour in a separate bowl. This combination will help to bind our ingredients, ensuring they stick together during cooking.
- Pour the egg and rice flour mixture into the bowl with the meat and herbs. Use your hands to mix thoroughly, ensuring even distribution of herbs and a smooth consistency throughout the batter.
- If the mixture feels too dry, add a bit of water, one tablespoon at a time, until you achieve a pliable but firm batter consistency. This is key for forming the Cha Oc into shapes later on.
Seasoning Adjustments
Tas ting and adjusting the seasoning is crucial:
- Start by adding 1 teaspoon of fish sauce and a pinch of salt to the batter. These elements are essential for bringing out the natural flavors of the snail meat and pork.
- Mix well and then take a small sample of the batter to cook in a pan. Cooking a small sample allows us to taste the mixture and adjust the seasoning without affecting the raw batter.
- After cooking, taste the sample. If needed, adjust the seasoning by adding more fish sauce or salt, according to your preference. Remember, the goal is to achieve a balance where no single flavor overwhelms the others.
- Once the seasoning is to your liking, the batter is ready for the next step. The flavors should blend harmoniously, with a hint of freshness from the herbs and a savory depth from the fish sauce and salt.
This part of the process is about fine-tuning. Taking your time here ensures that every bite of Chả Ốc is bursting with the perfect balance of flavors and textures.
Shaping and Cooking Cha Oc
Now that our batter is perfectly seasoned and our snails are prepared, it’s time to shape and cook our Chả Ốc. This phase is where the magic happens, transforming our ingredients into the delightful final dish.
Forming the Meat Mixture around Snails
To start, we take a generous tablespoon of our batter and flatten it slightly in the palm of our hand. We then place a snail in the center and gently wrap the mixture around it, ensuring it’s fully encased. This step requires a bit of patience and gentleness to ensure the snail is snugly wrapped without squeezing the mixture too tightly. The goal is to form a nice, even layer around each snail. Repeat this process until all snails are covered.
Steaming the Chả Ốc
Once all our snails are cozily wrapped in the flavorful mixture, it’s time to steam them. Arrange the prepared snails on a steamer tray, making sure there’s a little space between each one to allow the steam to circulate properly. Cover and steam over medium heat for about 15-20 minutes. You’ll know they’re done when they’re firm to the touch and have taken on a slightly glossy appearance. Steaming not only cooks them through but also locks in those fantastic flavors we’ve worked so hard to create.
Pan-Frying for Crispness
After steaming, our Chả Ốc are delicious as is, but we love adding an extra step to enhance their texture. Heat a bit of oil in a pan over medium heat. Once hot, carefully place the steamed Chả Ốc into the pan. Pan-fry them until they are beautifully golden brown on all sides. This usually takes about 2-3 minutes per side. The goal is to achieve a crisp exterior that contrasts wonderfully with the soft, flavorful interior. Serve them hot, with the dipping sauce on the side for that extra punch of flavor.
Assembly and Garnishing
After carefully shaping, steaming, and frying our Chả Ốc to perfection, it’s time to bring it all together with beautiful plating and thoughtful garnishing. This final step not only enhances the dish’s flavors but also its visual appeal, making it a feast for the senses.
Plating the Cha Oc
Start by selecting a plate or a shallow bowl that complements the vibrant colors and textures of Chả Ốc. We suggest a plain, white dish to make the colors of the food pop. Carefully arrange the Chả Ốc on the plate in a circular pattern or line them up for a modern look. Ensure each piece is visible and not overcrowded, as we want each snail and its accompanying crispy batter to stand out.
Adding Fresh Herbs and Garnishes
The magic of Vietnamese cuisine often lies in its fresh herbs and garnishes. For our Chả Ốc, delicate handfuls of fresh cilantro, mint, or Thai basil not only add a burst of freshness but also a lovely contrast in color. Sprinkle these herbs generously over the plated Chả Ốc. Additionally, a scattering of thinly sliced chili and a few wedges of lime on the side will allow diners to adjust the heat and acidity to their liking, enhancing the overall flavor profile of the dish.
Presentation Tips
When it comes to presentation, think of the plate as your canvas. Drizzle a bit of the flavorful dipping sauce we prepared around the Chả Ốc, creating a vibrant ring that invites the eye to explore. For a touch of elegance, you can also add edible flowers or microgreens. These not only add to the aesthetic appeal but also introduce subtle flavor nuances. Remember, the goal is to entice all senses, so don’t hold back on showcasing your creativity. Lighting is key in highlighting the textures and colors, so if you’re serving this at a dinner party, ensure the area is well lit. Finally, serve the Chả Ốc immediately while it’s still sizzling, to captivate both the eyes and the ears of your eagerly awaiting guests.
Make-Ahead Instructions
Our Chả Ốc can certainly be prepared ahead of time, making your cooking process more convenient and flexible. Here’s how you can prep the meat mixture early and store the dish properly for later use.
Preparing the Meat Mixture in Advance
To get a head start, you can prepare the meat mixture up to a day before cooking. Simply follow the steps for cleaning and mincing the snails, then mix them with the ground pork, finely chopped herbs, and seasonings as described. Once your mixture is ready, cover it tightly with plastic wrap or transfer it to an airtight container. Refrigerate this mixture overnight. The cool temperature will not only preserve it but also allow the flavors to meld together beautifully, enhancing the overall taste of your Chả Ốc.
Storing and Reheating Instructions
After cooking the Chả Ốc, if you find yourself with leftovers or you’ve cooked a batch specifically for later, storing them correctly is key to maintaining their taste and texture. Allow the Chả Ốc to cool completely before transferring them to an airtight container. They can be stored in the refrigerator for up to three days or in the freezer for up to a month.
When you’re ready to enjoy your pre-made Chả Ốc, reheating is easy and can efficiently restore their freshly cooked appeal. If frozen, thaw them in the refrigerator overnight. For reheating, you can either steam them for about 5-10 minutes until warm throughout or pan-fry them over medium heat. The goal is to restore their crisp exterior while ensuring they’re heated thoroughly. A little tip: brushing them lightly with oil before pan-frying can help bring back that delightful crispiness and prevent them from drying out.
Conclusion
We’ve walked through the delightful journey of making Chả Ốc, from the initial steps of preparing our ingredients to the final touches that make this dish a feast for the eyes as much as it is for the palate. Remember, the secret lies in the balance of flavors and the care put into each step. Whether you’re planning to dazzle your guests at a dinner party or simply treating yourself to a unique Vietnamese delicacy, this recipe promises a memorable culinary experience. Don’t forget to make the most of your leftovers or prepare your meat mixture ahead of time for a quick and delicious meal. Happy cooking and enjoy every bite of your homemade Chả Ốc!
Related Posts:
- Ultimate Banh It Ram Recipe: A Guide to Perfect Texture & Flavor
- Easy Bánh Nậm Recipe: Prep, Store & Reheat Tips for Authentic Flavors
- Easy Banh Bot Loc Tran Recipe: From Scratch to Serving
- Ultimate Bánh Bao Recipe: Cook, Store & Reheat Tips
- Ultimate Bê Thui Recipe: Enjoy & Preserve Vietnam’s Veal Delicacy
- Easy Bun Dau Mam Tom Recipe: A Guide to Authentic Vietnamese Cuisine
- Ultimate Cha Oc Recipe: From Prep to Plating Guide
- Ultimate Chao Ca Recipe Guide: Prep, Serve, and Store Like a Pro
- Ultimate Cha Gio Recipe: Traditional Vietnamese Spring Rolls Made Easy
- Ultimate Pho Sate Recipe: Bold Flavors & Easy Instructions
- Ultimate Guide to Viet Hot Pot: From Preparation to Variations
- Ultimate Guide to Vietnamese Winter Melon Soup: Cooking & Storage Tips
- Mi Xao Bo Toi: The Ultimate Guide to Vietnamese Stir-Fried Noodles
- Authentic Mi Quang Recipe: A Guide to Vietnamese Noodle Delight
- Chim Cut Roti: Ultimate Guide to Making Vietnamese Roasted Quail
- Ultimate Guide to Com Chay Chien Gion: Recipe & Tips for Crispy Rice Cakes
- Authentic Pha Lau Recipe & Tips for Storing Leftovers
- Xoi Chien Gion: Ultimate Guide to Crispy Vietnamese Rice Balls & Sauce
