
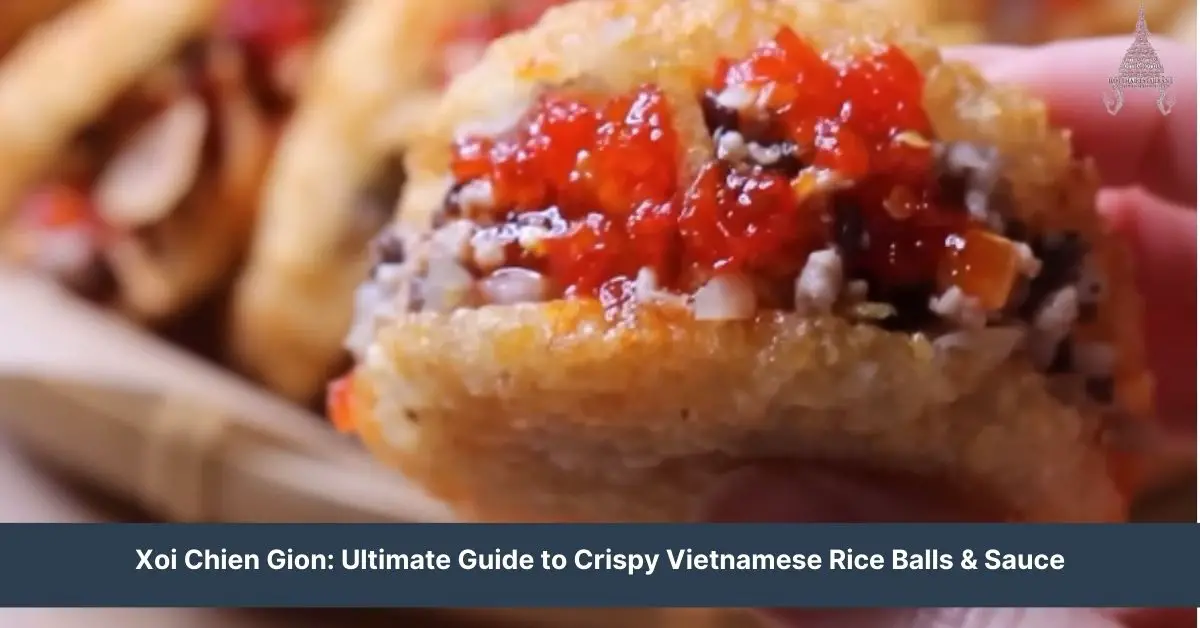
We’ve all had those moments when we crave something uniquely satisfying, a dish that combines a delightful crunch with a soft, comforting interior. That’s where xoi chien gion, a Vietnamese culinary gem, steps into the spotlight. This dish, with its golden, crispy exterior and sticky, sweet interior, offers an irresistible texture contrast that’s bound to captivate any food lover’s heart.
Originating from Vietnam, xoi chien gion is a testament to the creativity and rich culinary traditions of Vietnamese cuisine. Made from glutinous rice flour and filled with a sweet or savory filling, this dish is not just food; it’s an experience. It’s a journey through flavors and textures that exemplify the balance and harmony in Vietnamese cooking. Join us as we dive into the world of xoi chien gion, exploring its origins, its significance, and of course, how to bring this crispy delight to your own kitchen.
Ingredients for Xoi Chien Gion
Embarking on this culinary journey, we’ve compiled a detailed list of ingredients needed to craft the perfect Xoi Chien Gion. This comprehensive breakdown ensures you have everything at your disposal for creating this crispy, sweet, and savory delight.
Rice and Rice Flour Mixture
To achieve that signature crispy outer layer and tender interior, our rice and rice flour mixture is crucial. Here’s what you’ll need:
- 2 cups of glutinous rice flour
- 1 cup of jasmine rice, rinsed and soaked overnight
- 1/2 cup of water, adjust as needed to achieve dough consistency
- 1 tablespoon of sugar, to sweeten
This blend forms the base of our Xoi Chien Gion, ready to be filled with your favorite fillings.
Seasoning and Flavoring
To bring our dish to life, the right balance of seasoning and flavoring is essential. For this recipe, we’ll keep things traditional yet tantalizing:
- 1/4 cup of granulated sugar, for the dough’s sweetness
- 1 teaspoon of salt, to enhance flavors
- 1/4 cup of coconut milk, to infuse richness
- 1 tablespoon of sesame seeds, toasted, for garnishing
These ingredients will ensure our Xoi Chien Gion is not only visually appealing but deliciously balanced in flavors.
Dipping Sauce Components
No Xoi Chien Gion is complete without a complementary dipping sauce. Here’s how we’ll create ours:
- 1/4 cup of fish sauce
- 2 tablespoons of sugar
- 1/4 cup of warm water
- 2 tablespoons of lime juice
- 1 clove garlic, finely minced
- 1 red chili, finely sliced (optional for heat)
This dipping sauce offers a blend of savory, sweet, tangy, and spicy notes, perfectly accentuating the crispy rice balls.
Tools and Equipment Needed
In order to bring the delightful xoi chien gion to life in your kitchen, let’s ensure you have all the necessary tools and equipment ready. Proper preparation guarantees a smoother cooking experience, transforming your culinary endeavor into a joy rather than a chore. Here’s what we’ll need:
Mixing Bowls
A set of mixing bowls is crucial for combining the glutinous rice flour, jasmine rice, and other key ingredients. We recommend having at least two sizes on hand: one larger bowl for the main mixture and a smaller one for preparing the dipping sauce.
Measuring Cups and Spoons
Accuracy is key in achieving the perfect texture and flavor of xoi chien gion. Be sure to have a complete set of measuring cups and spoons to measure out all your ingredients precisely. This will make a world of difference in the final outcome.
Rice Cooker or Pot
Preparing jasmine rice to perfection requires either a rice cooker or a pot. If you’re using a pot, remember to keep an eye on the rice to avoid overcooking. The goal is to achieve fluffy, slightly sticky rice that will blend seamlessly with the glutinous rice flour.
Frying Pan or Deep Fryer
The crispy exterior that makes xoi chien gion so irresistible comes from deep frying. Whether you choose a deep fryer for uniformity or a frying pan for accessibility, ensure it’s large enough to fry multiple rice balls at a time without overcrowding.
Slotted Spoon
A slotted spoon is indispensable for safely lowering the rice balls into the hot oil and retrieving them once they’re golden brown and crispy. It provides an easy way to drain excess oil without resorting to paper towels.
Mixing Spatula
A sturdy mixing spatula will be your best friend when combining the glutinous rice flour mixture. It’s important for mixing thoroughly to ensure there are no lumps and that the texture is just right.
Paper Towels
Prepare a plate lined with paper towels to transfer the fried xoi chien gion immediately after cooking. This helps to absorb any extra oil, keeping your rice balls crispy on the outside and soft on the inside.
Gathering these tools and equipment before beginning your xoi chien gion adventure ensures a seamless and enjoyable cooking process. It allows you to focus on the art of making this Vietnamese delicacy, ensuring every crispy bite is as tempting and flavorful as the culture it represents.
Preparing the Sticky Rice
Let’s turn our attention to the heart of xoi chien gion—preparing the sticky rice. This is where the magic begins, and getting it right sets the stage for those beautiful crispy bites.
Washing and Soaking
First up, we’re tackling the essential steps of washing and soaking the rice. You’ll need:
- 2 cups of glutinous (sticky) rice
- Water for washing and soaking
- Rinse the Rice: Place the sticky rice in a large bowl. Fill it with cold water, and use your hands to gently stir the rice, washing away any impurities. Drain the murky water and repeat this process 2-3 times or until the water runs relatively clear.
- Soak the Rice: Once washed, cover the rice with fresh, cold water. Allow it to soak for at least 4 hours, though overnight is even better. Soaking the rice softens the grains, ensuring even cooking and the perfect chewy texture we’re after.
Steaming the Rice
After soaking, it’s time to steam the rice, transforming it into the soft, sticky base ready for frying.
- Prepare the Steamer: Line a steamer basket with cheese cloth or a clean, thin kitchen towel. This prevents the rice from falling through and helps it steam evenly.
- Drain the Rice: Before steaming, drain the soaked rice thoroughly to remove excess water. Give it a good shake to rid of any lingering water droplets.
- Steam the Rice: Transfer the drained rice into the lined steamer basket. Spread it evenly for uniform cooking. Cover and steam over boiling water for about 20-25 minutes. Halfway through steaming, stir the rice gently to ensure all grains are cooked thoroughly.
- Check for Doneness: The rice is ready when it’s glossy and tender to the bite but still chewy. It should stick together without being mushy.
Steaming the rice correctly is crucial for achieving xoi chien gion’s signature texture. With the rice prepped and ready, we’re set to move on to the next stage of our cooking adventure, ensuring our dish will have the perfect balance of crispy exterior and soft, savory interior.
Making the Dough for Xoi Chien Gion
After ensuring our sticky rice is perfectly steamed and chewy, it’s time to focus on crafting the dough that forms the crispy, golden exterior of our xoi chien gion. This dough is what sets our dish apart, giving it that irresistible crunch.
Mixing the Ingredients
For the dough, we’ll need the following:
- 2 cups of glutinous rice flour
- 1/2 cup of rice flour
- 3/4 cup of warm water
- 1 tablespoon of sugar
- 1/2 teaspoon of salt
To begin, we mix the glutinous rice flour and rice flour in a large bowl. We then add the sugar and salt, mixing well to ensure an even distribution. Slowly, we pour in the warm water while stirring continuously. This gradual addition of water helps us to control the dough’s consistency, making sure it’s neither too wet nor too dry.
Kneading the Dough
Once the ingredients are fully combined, it’s time to get our hands dirty. We transfer the dough onto a flat, clean surface and begin kneading. This process takes about 10 minutes. We’re aiming for a smooth, pliable dough that’s soft to the touch. If the dough feels too sticky, feel free to dust a little more rice flour onto our work surface and hands. Patience is key here; proper kneading is crucial for creating the perfect texture in our xoi chien gion.
Resting the Dough
After kneading, the dough needs to rest. This allows the flours to fully hydrate, which is essential for achieving that desirable crispy texture once fried. We shape the dough into a ball, place it back in the bowl, and cover it with a damp cloth. Let it rest for about 30 minutes. This resting period is a perfect time to prepare other components of the dish or simply clean up our workspace.
By following these steps meticulously, we ensure that our xoi chien gion will have the perfect balance of crispy exterior and soft, chewy interior – a texture combination that’s truly mouthwatering.
Shaping and Frying the Xoi Chien Gion
After the dough has rested, we’re now ready to bring xoi chien gion to life with its distinctive shape and iconic crispy texture. This next phase is where the magic happens, transforming simple ingredients into a delightful treat.
Forming the Balls
To start, we’ll divide the dough into equal portions, each weighing approximately 40 grams. This size is ideal for ensuring that each ball, once flattened and fried, cooks evenly and achieves the perfect ratio of crispy exterior to soft interior. Roll each portion between your palms to form a smooth ball. If the dough sticks to your hands, a little tip is to lightly oil your palms with a neutral oil, making the process a breeze.
Flattening the Dough
Next, take each ball and gently press it between your palms to form a disk approximately 1/4 inch thick. The key here is to apply even pressure, ensuring that the edges do not crack while maintaining uniform thickness throughout. This thickness is crucial for achieving the optimum texture once fried, allowing for a crispy shell with a delightfully chewy center.
Frying to Perfection
For the most exciting part—frying. Heat a deep skillet or frying pan over medium heat and add enough neutral oil to submerge the discs. We’re aiming for a temperature of around 350°F. Once the oil is hot, carefully slide in the discs, being sure not to overcrowd the pan. Fry the xoi chien gion until they’re golden brown and puffed up, which should take about 2 to 3 minutes on each side. The transformation is mesmerizing, as each disc blooms into a golden, crispy delight right before your eyes.
Use a slotted spoon to transfer the fried discs onto a plate lined with paper towels to drain any excess oil. This step ensures that your xoi chien gion remains crispy on the outside and tender on the inside without being overly greasy. Serve them warm for the ultimate taste experience, allowing the crispy texture and subtle flavors to shine through.
Preparing the Dipping Sauce
After achieving the perfect texture for our xoi chien gion, let’s enhance its flavors with the perfect complement—a flavorful dipping sauce. The right sauce can elevate this dish, adding layers of taste that make each bite unforgettable. Here’s how we prepare the dipping sauce that pairs beautifully with the crispy and tender xoi chien gion.
Ingredients for the Dipping Sauce
- 1/4 cup fish sauce
- 1/4 cup water
- 2 tablespoons sugar
- 2 tablespoons lime juice (freshly squeezed)
- 1 clove garlic, minced
- 1 red chili, finely sliced (adjust to taste)
- 2 tablespoons finely shredded carrot (for garnish)
Using these ingredients, we’ll create a sauce that balances sweet, salty, tangy, and spicy flavors, enhancing the overall taste of our xoi chien gion.
- Combine Liquids: Start by pouring the fish sauce and water into a small bowl. This mixture forms the base of our dipping sauce, offering a balance of savory and diluting components.
- Dissolve the Sugar: Add the sugar to the mixture and stir well until completely dissolved. The sugar counteracts the saltiness of the fish sauce, introducing a sweet note that’s crucial for our sauce’s flavor profile.
- Add Flavor Enhancers: Squeeze in the lime juice, ensuring it’s freshly squeezed for that zesty kick. Then, add the minced garlic and finely sliced red chili to infuse the sauce with a punch of freshness and a hint of heat.
- Garnish and Serve: Finally, sprinkle the finely shredded carrot over the top for a touch of color and an additional layer of texture. The carrot not only acts as a garnish but also introduces a subtle sweetness that complements the intense flavors of the sauce.
- Mix and Taste: Give the sauce a good stir to mix all the ingredients thoroughly. Taste and adjust the chili if you prefer a spicier kick, or add more sugar if you like it sweeter. The sauce should have a harmonious balance of salty, sweet, tangy, and spicy that will perfectly accompany your crispy xoi chien gion.
Assembling and Serving the Xoi Chien Gion
After crafting the perfect balance of flavors in our dipping sauce, it’s now time to bring together the elements of our xoi chien gion and present it in a way that invites everyone to dive in and enjoy. We’ll share with you the final steps to assemble this delightful dish and serve it with style.
Plating the Xoi Chien Gion
- Prepare the Plate: Choose a large platter that will comfortably hold your xoi chien gion. If you’re aiming for an aesthetic presentation, consider a platter that contrasts the colors of the dish, such as a dark blue or black plate for the golden-brown xoi chien gion.
- Arrange the Xoi Chien Gion: Carefully place the crispy xoi chien gion onto the platter. You might want to stack them slightly if you have many pieces, but ensure each piece is visible to highlight the crisp texture.
- Add Fresh Herbs: Scatter a generous amount of fresh herbs around and on top of the xoi chien gion. We recommend herbs like cilantro, mint, or basil. These not only add a pop of color but also a refreshing contrast to the rich, crispy xoi.
Serving the Sauce
- Individual Serving Bowls: Pour the dipping sauce into small bowls, ensuring there’s enough for each person to have their own. Personal bowls allow your guests to dip freely and enjoy the full spectrum of flavors with each bite.
- Garnishing the Sauce: Add a final touch to each bowl of sauce by sprinkling a bit more shredded carrot or a slice of red chili on top. This garnish not only beautifies the presentation but also hints at the flavors within the sauce.
- Positioning the Sauce: Place a serving bowl of sauce on each side of the platter or distribute the individual bowls around the platter. The goal is to make it easy for everyone to reach the sauce without disrupting the arrangement of the xoi chien gion.
- Temperature: Serve the xoi chien gion immediately while it’s still hot and the exterior is at its crispiest. The contrast between the warm xoi and the cool, tangy sauce creates an unforgettable eating experience.
Storing and Reheating Tips
After savoring the delightful crunch and complex flavors of xoi chien gion, you may find yourself with leftovers. Don’t worry! With the right storing and reheating methods, you can enjoy this delicious dish again with nearly the same taste and texture as when it was freshly made.
Storing Leftovers
To ensure your xoi chien gion remains as delectable as possible, follow these simple steps for storage:
- Cool Completely: Allow the xoi chien gion to cool down completely at room temperature. Storing it while still warm can lead to condensation inside the container, making the rice balls soggy.
- Airtight Container: Transfer the cooled xoi chien gion into an airtight container. This helps to lock in the flavors and prevents the rice balls from absorbing odors from the refrigerator.
- Refrigerate: Place the container in the refrigerator. Xoi chien gion is best enjoyed within 2-3 days of storage to maintain optimal flavor and texture.
Reheating to Perfection
Reheating xoi chien gion properly is crucial to restoring its signature crispy exterior. Here’s how to do it:
- Oven Method: Preheat your oven to 375°F (190°C). Arrange the xoi chien gion on a baking sheet lined with parchment paper, ensuring they are not touching. Heat for 10-15 minutes or until they are hot throughout and the exterior becomes crispy again.
- Air Fryer Method: For an even quicker method, use an air fryer. Preheat the air fryer to 350°F (180°C). Place the rice balls in the basket, making sure they don’t overlap. Air-fry for about 5-7 minutes, or until they are thoroughly heated and crispy.
Remember, microwaving is not recommended for reheating xoi chien gion as it tends to make them chewy and soft, losing their distinct crunch.
Conclusion
We’ve walked through the delightful journey of making xoi chien gion from the perfect sauce to the final touches that make it pop on your plate. Remember, the beauty of this dish lies not only in its taste but also in its presentation and the freshness of its accompaniments. Don’t forget to store any leftovers properly to enjoy this crispy delight another day. Whether you’re reheating it for a quick snack or serving it fresh to guests, xoi chien gion is sure to win hearts. So go ahead, give it a try and let the vibrant flavors of Vietnam brighten up your mealtime.
Related Posts:
- Ultimate Banh It Ram Recipe: A Guide to Perfect Texture & Flavor
- Easy Bánh Nậm Recipe: Prep, Store & Reheat Tips for Authentic Flavors
- Easy Banh Bot Loc Tran Recipe: From Scratch to Serving
- Ultimate Bánh Bao Recipe: Cook, Store & Reheat Tips
- Ultimate Bê Thui Recipe: Enjoy & Preserve Vietnam’s Veal Delicacy
- Easy Bun Dau Mam Tom Recipe: A Guide to Authentic Vietnamese Cuisine
- Ultimate Cha Oc Recipe: From Prep to Plating Guide
- Ultimate Chao Ca Recipe Guide: Prep, Serve, and Store Like a Pro
- Ultimate Cha Gio Recipe: Traditional Vietnamese Spring Rolls Made Easy
- Ultimate Pho Sate Recipe: Bold Flavors & Easy Instructions
- Ultimate Guide to Viet Hot Pot: From Preparation to Variations
- Ultimate Guide to Vietnamese Winter Melon Soup: Cooking & Storage Tips
- Mi Xao Bo Toi: The Ultimate Guide to Vietnamese Stir-Fried Noodles
- Authentic Mi Quang Recipe: A Guide to Vietnamese Noodle Delight
- Chim Cut Roti: Ultimate Guide to Making Vietnamese Roasted Quail
- Ultimate Guide to Com Chay Chien Gion: Recipe & Tips for Crispy Rice Cakes
- Authentic Pha Lau Recipe & Tips for Storing Leftovers
- Xoi Chien Gion: Ultimate Guide to Crispy Vietnamese Rice Balls & Sauce