
We’re diving into the world of seafood with a special focus on ladyfish, a slender and delicious catch that’s often overlooked. Known for its delicate flavor and firm texture, ladyfish offers a unique taste experience that we can’t wait to share with you. Whether you’re a seasoned chef or just starting to explore the bounty of the sea, this recipe promises to bring a fresh twist to your table.
Ingredients
Diving into the world of cooking ladyfish, a delectable yet often overlooked seafood gem, we’ll guide you through the essential ingredients needed to unlock its full flavor potential.
Here’s everything you’ll need to prepare a savory ladyfish dish that’s sure to impress:
- 2 whole ladyfish, cleaned and gutted (about 1-1.5 lbs each)
- 1 tablespoon olive oil
- Salt, to taste
- Black pepper, freshly ground, to taste
- 2 cloves garlic, minced
- 1 lemon, thinly sliced
- 2 tablespoons fresh parsley, chopped
- 1 teaspoon dried oregano
- 1/2 teaspoon red pepper flakes (optional for a spicy kick)
- 2 tablespoons white wine (optional for deglazing and added flavor)
- 1 tablespoon unsalted butter (optional for a richer finish)
For the sides (optional but recommended for a complete meal):
- 1 cup quinoa or rice, cooked according to package instructions
- A simple green salad (mixed greens, olive oil, lemon juice, salt, and pepper)
We precisely listed these ingredients to ensure a seamless cooking experience, providing clear directions and specific measurements to achieve the perfect blend of flavors. Each component was chosen to either complement or enhance the ladyfish’s natural taste, promising a dish that’s not only rich in flavor but also simple to prepare. Whether you’re a seasoned chef or new to seafood, these carefully selected ingredients will set you on the path to creating a beautifully balanced, mouth-watering ladyfish meal.
Required Tools and Equipment
Embarking on our ladyfish culinary journey requires not just fresh ingredients but also the right tools and equipment. Ensuring you have everything needed before you start cooking can make the process smoother and more enjoyable. So, let’s walk you through the essential kitchenware that will help turn your ladyfish recipe into a masterpiece.
Cutting Board and Sharp Knife
First on our list is a sturdy cutting board and a sharp knife. Preparing ladyfish often begins with slicing and dicing—whether you’re filleting the fish itself or chopping fresh herbs and vegetables to accompany it. A sharp knife will make your prep work easier and more precise, ensuring your ingredients are beautifully presented.
Skillet or Frying Pan
Next up, you’ll need a reliable skillet or frying pan. Ladyfish has a gorgeous, delicate texture that crisps up wonderfully when seared or fried. A good-quality non-stick skillet or cast-iron frying pan will serve you well, providing even heat distribution for perfectly cooked fish every time.
Mixing Bowls
Mixing bowls are indispensable, especially when you’re marinating the ladyfish or preparing a side dish to complement its flavors. Having a set of mixing bowls in various sizes allows you to marinate efficiently and mix your ingredients without creating a mess.
Measuring Cups and Spoons
Precision is key in cooking, and that’s where measuring cups and spoons come into play. They ensure that you’re using the exact amounts specified in the recipe, which is crucial for achieving the desired balance of flavors. Whether it’s measuring out spices, herbs, or liquids, these tools will keep your culinary experiment on track.
Baking Sheet (Optional)
For those preferring an oven-baked approach to cooking ladyfish, a baking sheet lined with parchment paper is your best friend. This method is excellent for a hands-off approach that lets the oven do most of the work while you prepare sides or set the table.
Spatula or Tongs
Lastly, a spatula or pair of tongs will be extremely helpful when it comes to flipping or transferring the ladyfish. These tools provide a gentle way to handle the fish, ensuring it remains intact and beautifully presented upon serving.
Make-Ahead Instructions
Preparing a ladyfish dish can seem daunting, but with the right make-ahead instructions, you’ll find yourself breezing through the process. Let’s discuss how you can get a head start on your cooking to make the actual day of preparation smooth and stress-free.
Marinating the Ladyfish
One of the best ways to infuse our ladyfish with flavor is by marinating it before cooking. The night before you plan to cook, prepare your marinade following the recipe’s instructions. Lay the ladyfish in a shallow dish, pour the marinade over the fish, making sure it’s well-coated, cover, and store in the refrigerator overnight. This allows the flavors to penetrate deep into the fish, enhancing its natural taste and tenderness.
Preparing the Ingredients
Apart from marinating the fish, another time-saving step is to prepare all other ingredients ahead of time. If your recipe includes vegetables, herbs, or any additional components, chop, measure, and store them in separate containers in the refrigerator. Having everything prepped and ready to go will significantly speed up your cooking process.
Making the Sauce
If your ladyfish recipe includes a sauce or dressing, consider making this ahead as well. Sauces often taste better the next day as the flavors have more time to meld together. Simply prepare the sauce as directed, transfer it to an airtight container, and refrigerate. Before serving, give the sauce a good stir or a quick warm-up if needed, and it’ll be as good as freshly made.
Following these make-ahead instructions not only saves you time but also reduces the last-minute rush in the kitchen, making your cooking experience more enjoyable.
Preparing the Ladyfish
After gathering our ingredients, it’s time to focus on the ladyfish, ensuring it’s perfectly prepped to absorb all the wonderful flavors we have in store.
Cleaning and Scaling
First up, let’s clean and scale the fish, a crucial step to ensure our dish is delightful. You’ll need:
- A sturdy, non-slip cutting board
- A sharp knife
- A scaling tool or the back edge of a knife
Place the ladyfish on the cutting board. Using the scaling tool or the back edge of a knife, gently scrape against the grain of the scales under running water. This not only minimizes the mess but also prevents scales from flying around. Work from tail to head, ensuring all scales are removed. Next, make a shallow incision along the belly of the fish and carefully remove the guts. Rinse the fish inside and out with cold water, and pat dry with paper towels. Now, our ladyfish is ready for the next phase of our culinary adventure.
Marinating the Fish
Marinating the ladyfish is where the magic begins. The marinade will infuse the fish with a depth of flavor and that signature tenderness we’re aiming for.
Gather the following for the marinade:
- 1/4 cup olive oil
- 2 tablespoons lemon juice
- 1 teaspoon salt
- 1/2 teaspoon black pepper
- 1 tablespoon minced garlic
- 1 teaspoon grated ginger
- 1/4 cup chopped fresh herbs of your choice (cilantro, parsley, or dill work wonderfully)
In a mixing bowl, whisk together olive oil, lemon juice, salt, pepper, minced garlic, and grated ginger. Stir in the chopped herbs to combine. Place the cleaned ladyfish in a shallow dish or a zip-lock bag and pour the marinade over it. Ensure the fish is completely coated. Cover or seal and refrigerate. Marinating overnight will deepen the flavors, but if you’re short on time, a minimum of 30 minutes will do.
By cleaning, scaling, and marinating the ladyfish with care and precision, we set the stage for a truly memorable dish.
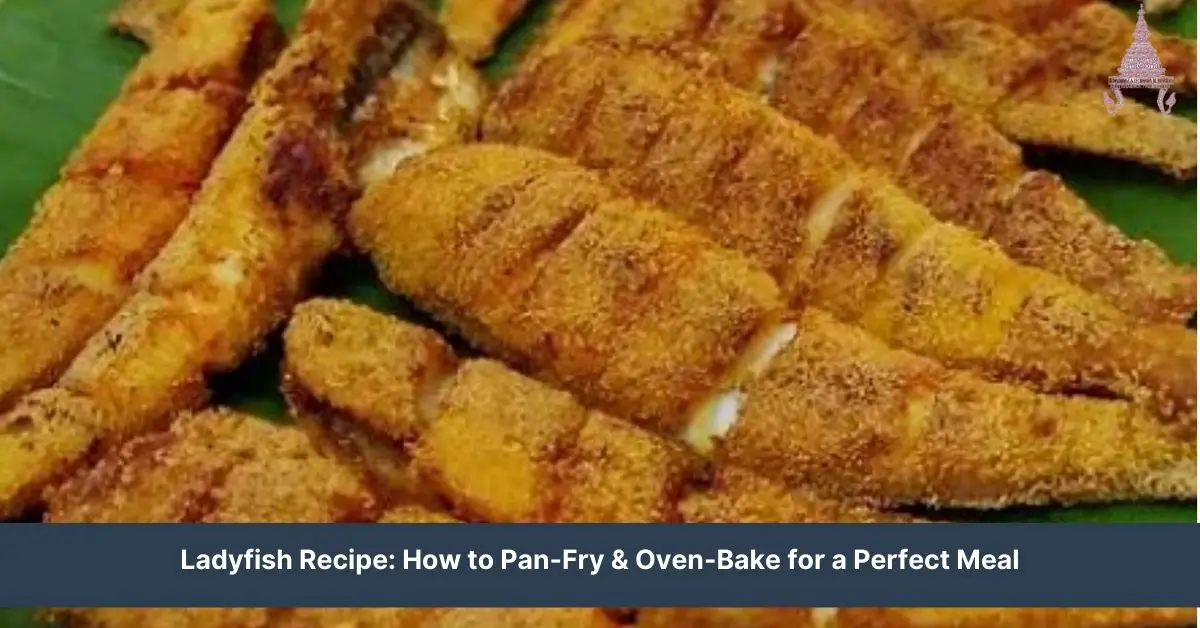
Cooking Instructions
After marinating your ladyfish to perfection, it’s time to bring this delicious dish to life. Let us guide you through two excellent cooking methods: pan-frying for a crispy finish or oven-baking for a lighter touch.
Pan-Frying the Ladyfish
- Preheat your Pan: Start by heating a large non-stick skillet over medium-high heat. A drop of water should dance on the surface when it’s ready.
- Add Oil: Pour enough olive oil to lightly coat the bottom of the pan. This ensures your fish doesn’t stick and adds a nice golden crust.
- Prepare the Fish: While the pan heats, take your marinated ladyfish out of the fridge. Let it sit at room temperature for about 10 minutes. This promotes even cooking.
- Fry: Place the ladyfish gently in the pan. Be cautious as the oil may splatter. Fry each side for 3-4 minutes until you achieve a golden-brown color. The fish should release easily from the pan when it’s cooked.
- Drain & Serve: Once fried to perfection, transfer the ladyfish onto a plate lined with paper towels to soak up any excess oil. Serve hot, garnished with lemon wedges and a sprinkle of fresh herbs for an extra burst of flavor.
Oven-Baking the Ladyfish
- Preheat Your Oven: Heat your oven to 400°F (200°C). This high temperature is crucial for encapsulating the juices and ensuring a tender finish.
- Prepare a Baking Tray: Line a baking tray with parchment paper. This prevents sticking and ensures a smooth release after cooking.
- Arrange the Fish: Arrange your marinated ladyfish on the baking tray. Ensure there’s space between each piece to allow hot air to circulate, promoting an even bake.
- Bake: Slide the tray into the oven and bake for about 10-12 minutes. Cooking time varies depending on the thickness of your fish. The ladyfish is ready when it flakes easily with a fork and has a slight translucence in the center.
- Serve: Remove the baked ladyfish from the oven and let it rest for a few minutes before serving. This resting period allows the juices to redistribute, making every bite succulent. Serve with a side of roasted vegetables or a fresh salad for a complete meal.
Both methods present a beautiful way to enjoy the delicate flavors of ladyfish. Whether you prefer the crispy texture from pan-frying or the simplicity and healthiness of oven-baking, these instructions will ensure a dish that’s both flavorful and satisfying.
Serving Suggestions
After cooking the ladyfish to perfection, either through pan-frying for that irresistibly crispy texture or oven-baking for a lighter, delicate finish, we have some fantastic serving suggestions. These not only complement the flavor of the ladyfish but also turn your meal into a feast for the senses.
Side Dish Recommendations
Selecting the right side dishes can elevate the ladyfish from a simple meal to a memorable dining experience. We love pairing it with:
- Aromatic Jasmine Rice: The subtle fragrance and slight stickiness of jasmine rice make it an excellent companion, absorbing the flavors while providing a comforting texture.
- Grilled Vegetables: A medley of grilled vegetables such as bell peppers, zucchinis, and asparagus adds a smoky contrast to the fish’s delicate flavor.
- Roasted Sweet Potatoes: The natural sweetness and velvety texture of roasted sweet potatoes offer a hearty balance to the lightness of the fish.
- Quinoa Salad: For a nutritious and fresh option, a vibrant quinoa salad with lemon dressing and fresh herbs pairs wonderfully, adding a refreshing zing.
- Steamed Broccoli or Green Beans: Simple yet elegant, lightly steamed broccoli or green beans seasoned with a pinch of salt and a drizzle of olive oil provide a crisp, healthy side.
Sauce Pairings
The right sauce can transform your ladyfish, adding layers of flavor and moisture. Here are our top sauce recommendations:
- Lemon Butter Sauce: The classic combination of butter and lemon juice, with a hint of garlic and parsley, is always a hit. It enhances the fish’s delicate taste without overpowering it.
- Caper Sauce: A caper sauce, with its lovely briny flavor, provides a wonderful contrast to the sweetness of the fish. Simply sauté capers, garlic, and shallots in olive oil, then finish with lemon juice.
- Creamy Dill Sauce: A silky, herbaceous dill sauce made with cream and a touch of mustard gives the dish a luxurious feel, marrying well with the gentle texture of ladyfish.
- Spicy Mango Salsa: For those who enjoy a bit of heat and sweetness, a spicy mango salsa with chili, cilantro, and lime juice brings a tropical flair and vibrant colors to your plate.
- Tartar Sauce: A homemade tartar sauce, with pickles, mayonnaise, and a hint of dill, complements the crispy skin of pan-fried ladyfish beautifully, adding creaminess and crunch.
Whether you opt for the delightful crunch of a pan-fried ladyfish or the subtle nuances of an oven-baked fillet, these side dishes and sauces are sure to make your meal even more enjoyable.
Storing Leftovers
After savoring the deliciously cooked ladyfish and pairing it with some delightful sides and sauces, it’s not uncommon to find ourselves with leftovers. To ensure that the leftover ladyfish retains its flavor and texture, proper storage is key. Here’s how we recommend storing your cooked ladyfish to enjoy later.
In the Refrigerator
First, allow the cooked ladyfish to cool to room temperature. It’s crucial not to leave seafood out for more than two hours to avoid bacterial growth. Once cooled, transfer the ladyfish into an airtight container. If you have lemon butter sauce or any other sauce left over, consider storing it in a separate container to maintain the fish’s crispiness.
Place the sealed container in the refrigerator. Properly stored, the cooked ladyfish will last for 2 to 3 days. When you’re ready to enjoy it again, we suggest reheating the fish gently to preserve its moisture. A low oven or microwave with a sprinkle of water can help restore the fish’s texture without drying it out.
In the Freezer
For longer storage, freezing is an excellent option. Wrap the cooked ladyfish tightly in aluminum foil or freezer wrap, then place it in a heavy-duty freezer bag. Be sure to squeeze out as much air as possible before sealing the bag. Label it with the date, so you remember when you froze it.
Frozen cooked ladyfish will maintain the best quality for up to 3 months. Thawing should be done in the refrigerator overnight. It’s best to avoid thawing seafood at room temperature as it can cause the texture to become mushy. Once thawed, reheat it gently to ensure the ladyfish still tastes as delicious as when it was first cooked.
By following these simple steps, you can ensure that your ladyfish leftovers remain just as delightful as the day they were cooked.
Conclusion
We’ve explored the delightful world of ladyfish, from its unique flavor to various cooking methods. Whether you choose to pan-fry or oven-bake, pairing it with jasmine rice and your favorite sauces will surely elevate your meal. Remember, storing leftovers properly will let you enjoy this delicious seafood without compromising on taste or texture. So why not give ladyfish a try and surprise your taste buds with something new and exciting? Happy cooking!
Related Posts:
- Canh Chua Cá Bông Lau: A Taste of Vietnam’s Mekong Delta
- Master Canh Cá Chim Măng Chua: Prep, Store & Reheat Guide
- Easy Vietnamese Chicken Wings Air Fryer Recipe: Crispy & Flavorful
- Iced Coffee Rose: A Stunning, Flavorful Beverage Guide
- Ladyfish Recipe: How to Pan-Fry & Oven-Bake for a Perfect Meal
- Ultimate Michelada with Shrimp Recipe: Elevate Your Cocktails
- Honey Soy Pork Belly Bites: Recipe, Storage & Reheating Guide
- Taiwanese Cucumber Salad: A Perfect Blend of Freshness and Flavor
- Ultimate Taro Pie Recipe: Creamy Filling & Flaky Crust Guide
- Ultimate Guide to Vietnamese Head Cheese (Giò Thủ): Culture & Recipe