
Imagine infusing your Thanksgiving turkey with a rich, smoky flavor that tantalizes the taste buds and elevates your festive feast. Whiskey turkey brine does just that, marrying the boldness of whiskey with traditional brining spices to create a juicy, flavorful bird that’s sure to impress your guests. This method isn’t just about taste—it’s a celebration of culinary creativity and holiday tradition.
Ingredients
Get ready to blend the bold flavors of whiskey with traditional spices in your turkey brine. Here’s everything you need to create a memorable whiskey turkey brine.
For the Whiskey Brine
- 1 gallon of water
- 1 cup salt, preferably Kosher
- 1 cup brown sugar
- 1 cup whiskey
- 2 tablespoons whole black peppercorns
- 5 cloves garlic, minced
- 1 large orange, quartered
- 3 bay leaves
- 4 sprigs fresh thyme
For the Turkey
- 1 whole turkey (12 to 14 pounds), thawed, giblets, and neck removed
- Additional water, as needed to fully submerge the turkey
- Ice or cold water to chill the brine solution before use
Required Equipment
To ensure your whiskey turkey brine infuses perfectly, you need the right tools and equipment. Here’s what you’ll need to gather:
- Large Brining Container: Select a non-reactive container large enough to comfortably hold your turkey and the brine. This could be a brining bag, a large stockpot, or a clean 5-gallon bucket.
- Measuring Cups and Spoons: Accurate measurements are crucial for the brine’s balance of flavors. Have a set of measuring cups and spoons ready.
- Large Stirring Spoon: A long-handled spoon will be necessary to stir the brine and ensure that the salt and sugar dissolve completely into the water.
- Refrigerator Space: Ensure you have enough space in your refrigerator to store the turkey once it’s submerged in the brine. If fridge space is tight, consider clearing out shelves ahead of time.
- Thermometer: A good-quality kitchen thermometer is essential to check the temperature of the brine before introducing the turkey, ensuring it’s adequately chilled.
Preparing the right equipment beforehand will streamline your brining process, making it a breeze to get that turkey ready for the big feast. Gather these items, and you’re set to move on to the next steps in your brining journey.
Preparation
Now that you have all the necessary equipment ready, it’s time to dive into the preparation of your whiskey turkey brine, setting the stage for a flavorful Thanksgiving feast.
Cleaning the Turkey
Before you can introduce your turkey to its flavorful whiskey bath, make sure it’s properly cleaned and prepped. Start by removing the turkey from its packaging and disposing of any included giblets and neck, which you might like to save for making stock later. Rinse the entire bird thoroughly under cool, running water. Pat the turkey dry with paper towels, ensuring the skin is completely dry to better absorb the brine. Set your cleaned turkey aside on a large tray or in a roasting pan while you prepare the brine.
Making the Brine
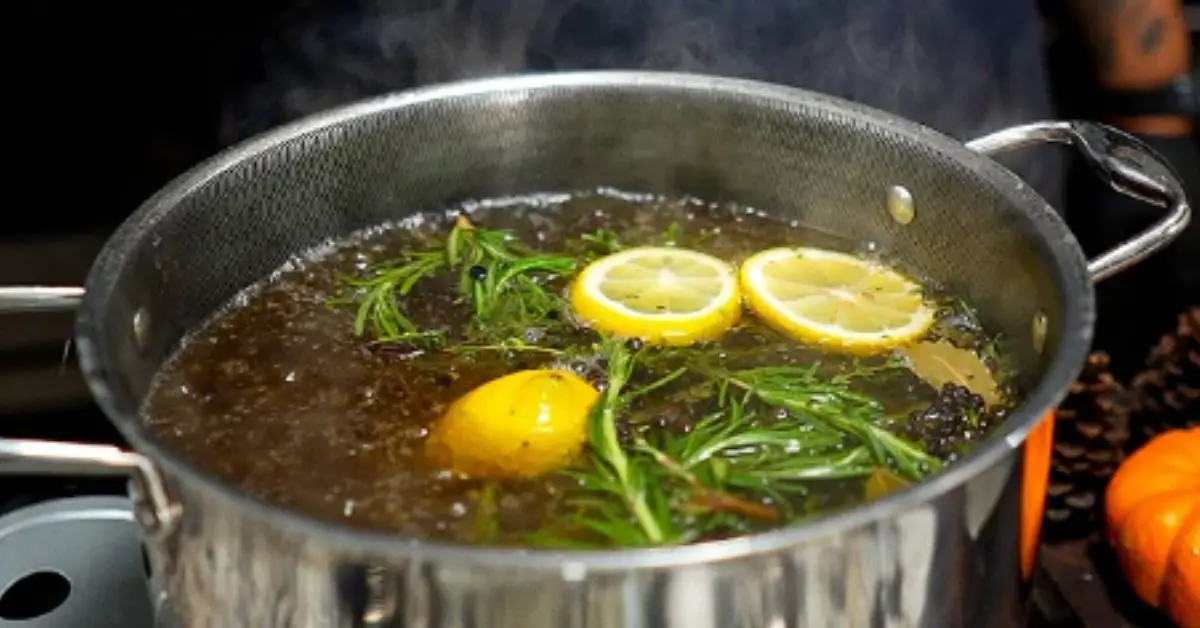
To create the brine that will infuse your turkey with those delicious, bold whiskey flavors, begin by boiling water in a large pot—large enough to eventually immerse your turkey. To the boiling water, add 1 cup of salt and ½ cup of sugar, stirring until fully dissolved. Turn off the heat and cool the mixture slightly before adding the aromatic components: 2 cups of whiskey, 4 bay leaves, a tablespoon of peppercorns, and a bundle of fresh herbs like thyme and rosemary. Stir well to combine these ingredients, releasing their fragrant oils.
Once the mixture is well blended, pour in enough cold water to ensure the mixture can completely cover the turkey in your chosen brining container. Make sure the brine is at room temperature or colder before submerging your turkey to prevent bacterial growth. Carefully place your turkey in the brining container and pour the brine over it, ensuring the bird is fully immersed. Cover the container with a lid or plastic wrap and refrigerate for at least 12 to 24 hours, allowing the flavors to permeate deeply into the meat. This step is crucial for achieving that delectably juicy and flavorful Thanksgiving turkey.
Brining the Turkey
Now that your brine is ready and your turkey cleaned, it’s time to combine them to start the magical flavor infusion process.
Submerging the Turkey
First, you’ll need a large container or brining bag that can comfortably hold your turkey and enough brine to completely submerge it. Place your turkey breast side down in the container. Slowly pour the whiskey brine mixture over the turkey, making sure it gets inside the cavity as well. If the turkey isn’t fully covered, you can add a mix of ice water to cover it completely.
Ensure the turkey stays submerged by weighing it down with a plate or a brine bag seal designed for this purpose. This method keeps the turkey fully immersed in the flavorful brine and prevents any parts from floating above the surface, which could result in uneven seasoning.
Brining Time
Proper brining time is crucial for achieving the perfect balance of flavor and texture. For optimal results, refrigerate the turkey in the brine for at least 12 hours but not more than 24 hours. Keeping the turkey in the brine for the right amount of time ensures that it absorbs all the complex flavors from the whiskey and spices without becoming too salty.
Check the temperature of your refrigerator to make sure it is at or below 40°F (4°C) to keep the turkey safe and prevent bacterial growth during the brining process. After the specified brining period, remove the turkey from the brine, discard the brine, and rinse the turkey under cold water to remove excess salt on the surface. Now, your turkey is ready for drying and the next steps in your Thanksgiving feast preparation.
Cooking the Turkey
After your turkey has marinated in the flavorful whiskey brine, it’s time to cook it. This next step will bring out the rich flavors and ensure your turkey is deliciously tender and juicy.
Preparing for Roast
- Preheat Your Oven: Start by setting your oven to 350 degrees Fahrenheit. This moderate temperature will cook the turkey evenly without drying it out.
- Prepare the Roasting Pan: Line a roasting pan with foil for easy cleanup and set a roasting rack inside the pan. This setup allows the heat to circulate evenly around the turkey.
- Dry the Turkey: Remove the turkey from the brine and pat it dry with paper towels. Ensuring the skin is dry helps it crisp up in the oven.
- Season the Turkey: Lightly season the turkey’s skin with additional salt and a little pepper, if desired. Although the brine has already seasoned the meat, this extra step adds a nice touch to the skin.
- Stuff the Turkey (Optional): If you prefer a stuffed turkey, now is the time to add your stuffing. Make sure not to pack it too tightly, as it needs space to expand and cook through.
- Truss the Turkey: Truss the turkey by tying the legs together and tucking the wing tips under the body. This helps maintain the turkey’s shape and ensures even cooking.
- Add Liquids: Pour a cup of water or chicken broth into the bottom of the pan to help maintain moisture during cooking. This creates a humid environment that keeps the turkey moist.
Roasting the Turkey
- Place in the Oven: Carefully place the prepared turkey on the roasting rack in the preheated oven. Make sure it’s in the middle of the oven to allow for even heat distribution.
- Roasting Time: The general rule for cooking a turkey is about 13 minutes per pound. However, this can vary based on your oven and the size of the bird. For a 12-pound turkey, the cooking time would approximately be 2 hours and 36 minutes.
- Baste the Turkey: Baste the turkey every 45 minutes with the juices collected at the bottom of the pan. Basting helps keep the surface moist and adds flavor.
- Check for Doneness: The turkey is done when the internal temperature at the thickest part of the thigh reads 165 degrees Fahrenheit on a meat thermometer. Be sure not to touch the bone with the thermometer, as this can give an inaccurate reading.
- Rest Before Carving: Once cooked, remove the turkey from the oven and let it rest for at least 20 minutes. Resting allows the juices to redistribute throughout the meat, making for a moister and more flavorful turkey.
Serving Suggestions
After you’ve successfully cooked your whiskey-brined turkey, choosing the right side dishes and presentation style can greatly enhance your festive meal. Here are some ideal pairings and tips to make your Thanksgiving table truly memorable.
Complement with Classic Sides
Pair your succulent whiskey turkey with traditional Thanksgiving sides that balance its rich flavor. Consider these favorites:
- Creamy Mashed Potatoes: The smooth texture contrasts beautifully with the turkey’s complex flavors.
- Green Bean Almondine: Light and crisp, these provide a fresh contrast to the savory turkey.
- Cranberry Sauce: Opt for a homemade version with orange zest to complement the whiskey tones in the turkey.
- Sourdough Stuffing: Incorporate herbs such as sage and thyme that echo those used in the brine.
Choose the Right Beverages
Select beverages that harmonize with the deep, smoky flavors imparted by the whiskey brine:
- Bold Red Wines: A rich Cabernet Sauvignon or a fruity Merlot pairs wonderfully, cutting through the richness of the turkey.
- Sparkling Water: For a non-alcoholic option, serve chilled sparkling water with a slice of lemon to refresh the palate between bites.
Presentation Tips
How you present your turkey can be just as important as how you cook it:
- Garnish Generously: Decorate your turkey platter with sprigs of fresh herbs like rosemary and thyme. Add some whole cranberries for a pop of color.
- Carve at the Table: Bring your turkey to the table whole and carve it in front of your guests for a touch of drama and tradition.
Conclusion
Ready to elevate your Thanksgiving table with a touch of gourmet flair? Embracing the whiskey turkey brine is your ticket to a memorable feast that’ll have everyone talking. With the rich, deep flavors infused into your turkey and the perfect pairings of sides and drinks you’ve prepared, your holiday meal is set to impress. So go ahead, carve that beautifully bronzed turkey right at the table and watch as your guests delight in the succulent taste that only your whiskey brine could create. Here’s to a Thanksgiving filled with joy, laughter, and fantastic food! Cheers to a new tradition!
Related Posts:
- How to Make Miso Cured Egg Yolks: A Unique Umami Garnish
- Easy Asian Arugula Salad Recipe: Refreshing & Quick Meal Ideas
- Ultimate Baked Brie Recipe: Ingredients and Serving Tips
- Ultimate Shorshe Ilish Recipe Guide: Tips for Authentic Flavor
- Honey Butter Tteokbokki: A Sweet Twist on Korea’s Spicy Favorite
- Mastering Hot and Sour Soup: Ingredients, Tips, and Preparation
- Easy Huso Dog Rolls Recipe: Perfect for Parties
- Ultimate Guide to Whiskey Turkey Brine for Thanksgiving
- Quick & Tasty Stir Fried Sweet Potato Leaves: Fresh Tips & Serving Ideas
- Lemongrass Beef Banh Mi: Ultimate Recipe & Serving Tips
