
Ever stumbled upon a dish that’s as intriguing as its name? That’s Hamachi Kama for us. A beloved gem in Japanese cuisine, this dish features the collar of yellowtail fish, grilled to perfection. It’s a part of the fish that’s often overlooked, but trust us, it’s where you’ll find some of the most tender, flavorful meat.
Diving into Hamachi Kama, we’re not just talking about a recipe; we’re exploring a culinary adventure. This dish is celebrated for its rich, buttery texture and a flavor that’s both subtle and complex. It’s a testament to the beauty of Japanese cooking, where simplicity meets sophistication.
So, let’s get our grills ready and embark on this delicious journey together. We promise, it’s going to be a savory experience that’ll leave you craving more.
Ingredients for Hamachi Kama
Embarking on the journey to perfect Hamachi Kama begins with selecting the finest ingredients. Here’s a comprehensive guide to everything you’ll need.
Choosing Your Hamachi Kama
The star of the show is, undeniably, the Hamachi Kama, or the yellowtail collar. When selecting your Hamachi Kama, we recommend opting for fresh, high-quality collars. Look for pieces that have a vibrant, pinkish hue with a firm texture, which indicates freshness. Ideally, each collar should weigh between 6 to 8 ounces. This size ensures a delightful balance between the tender, fatty meat and the charred exterior, achieving that coveted crispy skin and succulent flesh.
Additional Ingredients
Once you’ve secured the perfect Hamachi Kama, it’s time to gather the additional ingredients that will elevate this dish:
- 2 tablespoons soy sauce: For the marinade, soy sauce imparts a salty, umami-rich base.
- 1 tablespoon mirin: This sweet cooking sake adds a mild sweetness, balancing the soy sauce’s saltiness.
- 1 tablespoon sake: Regular sake introduces a subtle depth and aroma to the marinade.
- 1 teaspoon grated ginger: Fresh ginger brings a sharp, peppery bite that cuts through the fattiness of the fish.
- 2 cloves garlic, minced: Garlic adds a pungent flavor that pairs beautifully with the ginger.
- 1 tablespoon vegetable oil: Ideal for brushing on the fish before grilling, ensuring it doesn’t stick to the grill and providing a crispy exterior.
- Lemon wedges, for serving: The bright acidity of lemon is the perfect accompaniment, enhancing the fish’s rich flavor when squeezed over just before eating.
Gathering these ingredients is the first step in creating a culinary masterpiece. Each component plays a crucial role in infusing the Hamachi Kama with depth and character.
Required Tools and Equipment
To embark on the journey of preparing Hamachi Kama, the grilled collar of yellowtail fish, assembling the right tools and equipment is pivotal. We’ve compiled a list to ensure you have everything needed to execute this dish flawlessly. Let’s dive into what you’ll need.
Grilling Tools
For an authentic taste and perfect sear, a quality grill is indispensable. You can use either:
- Outdoor Grill: Ideal for achieving that smoky flavor synonymous with outdoor cooking.
- Stovetop Grill Pan: An excellent alternative for those who prefer cooking indoors. Ensure it is heavy-duty and has ridges for those perfect grill marks.
Kitchen Essentials
Next, we assemble the basic kitchen tools required:
- Sharp Knife: To properly prepare your Hamachi Kama, a sharp knife is essential for clean cuts.
- Cutting Board: A sturdy cutting board protects your countertops and ensures a safe cutting environment.
- Mixing Bowls: For preparing the marinade, have a set of mixing bowls on hand.
- Measuring Cups and Spoons: Accuracy is key when it comes to the art of cooking. Precise measurements of soy sauce, mirin, and other ingredients enhance the dish’s flavor.
Additional Utensils
There are a few more utensils that will smooth your cooking process:
- Brush: A brush is handy for evenly applying the marinade over the Hamachi Kama.
- Tongs: When it’s time to turn the fish on the grill, tongs become an indispensable tool for handling the hot food safely.
- Aluminum Foil: Helpful for wrapping the fish if you opt for a more steamed approach or if you’re looking to keep it warm post-grilling.
- Serving Platter: Select a serving platter that complements the aesthetic of this elegant dish.
Gathering these tools and equipment before you begin will not only ease the cooking process but also ensure that your Hamachi Kama turns out as a beautifully grilled masterpiece. With everything in place, we’re ready to move on to the heart of the recipe, where we’ll infuse our Hamachi Kama with delightful flavors.
Preparation Before Cooking
Before diving into the culinary action, let’s gear up for a smooth and flawless prep process that transforms the Hamachi Kama into a gastronomic delight.
Thawing the Hamachi Kama
To start, if your Hamachi Kama is frozen, it’s crucial to thaw it properly for the best results. We recommend transferring the fish from the freezer to the refrigerator at least 24 hours before you plan to grill it. This slow thawing process ensures that the Hamachi Kama retains its succulent texture and flavors, setting the stage for a memorable dish. Remember, rushing this step with methods like microwaving or hot water can adversely affect the quality of the fish, leading to a less desirable texture and flavor. Patience here is key.
Marinating the Hamachi Kama
Once thawed, it’s marinating time—our opportunity to infuse every bite with depth and character. Begin by preparing the marinade. In a bowl, whisk together 1/4 cup soy sauce, 2 tablespoons mirin, 1 tablespoon grated ginger, and 1 minced garlic clove. This mixture strikes the perfect balance between savory, sweet, and a touch of zing, complementing the Hamachi Kama’s natural flavors.
Gently place the Hamachi Kama in a large, shallow dish or a resealable plastic bag. Pour the marinade over the fish, ensuring it’s well-coated on all sides. Let the Hamachi Kama marinate in the refrigerator for at least 30 minutes, or for a more profound flavor, up to 2 hours. As it soaks, the marinade works its magic, penetrating the fish with each component’s essence, promising a richer and more nuanced taste profile.
Underneath this surface-level preparation lies our dedication to elevating the Hamachi Kama’s innate qualities, preparing it to shine as the star of the meal. Through careful thawing and thoughtful marinating, we’re not just cooking; we’re crafting an experience.
Cooking Instructions
After preparing your Hamachi Kama with a fragrant marinade, it’s time to bring out its delicious flavors through grilling or baking. Choose the method that best suits your kitchen setup and personal preference.
Preheat Your Grill or Oven
For grilling, preheat your grill on medium-high heat. You’re aiming for a temperature of around 400°F to 450°F. This ensures a nice sear on the fish while keeping the inside moist and tender. For oven-baking, preheat your oven to 375°F. A properly preheated oven will provide consistent heat, promoting even cooking and a delightful texture.
Grilling the Hamachi Kama
First, ensure your grill grates are clean to prevent the fish from sticking. Lightly oil the grates if necessary. Remove the Hamachi Kama from the marinade, allowing any excess to drip off. Do not wipe or pat dry; you want some of that marinade to help form the crust. Place the Hamachi Kama on the grill, skin side down. Grill for about 3-5 minutes, then gently flip it over. Continue grilling for another 7-10 minutes or until the edges start to crisp and the fish flakes easily with a fork. The exact time will depend on the thickness of the fish. Keep an eye on it to prevent overcooking, which can dry out the fish.
Oven-Baking the Hamachi Kama
When oven baking, line a baking sheet with aluminum foil for easy cleanup, and place a wire rack on top. The rack helps air circulate around the fish, cooking it evenly. Arrange the marinated Hamachi Kama on the rack, skin side up, allowing any excess marinade to drip off. Bake in the preheated oven for about 15-20 minutes. The cooking time may vary depending on the oven and the size of the fish collars. You’re looking for a golden-brown surface and a tender, flaky interior. Once done, you can broil the fish for 1-2 minutes to achieve a more charred exterior. Keep a close watch during this final step to avoid burning.
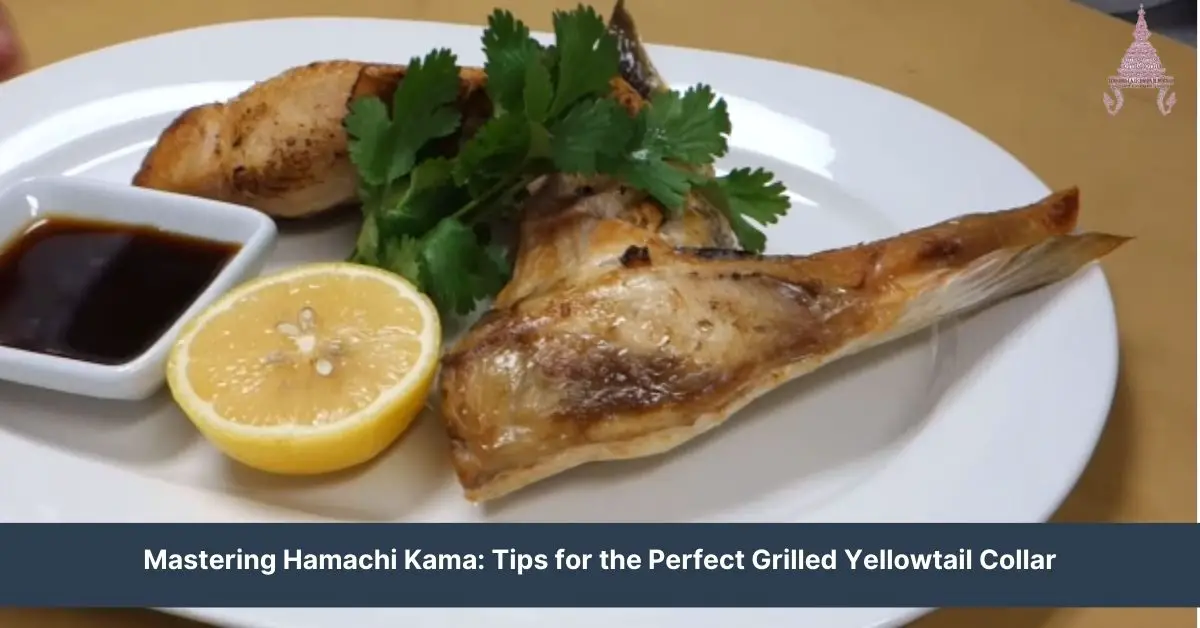
Remember, whether grilling or baking, let the Hamachi Kama rest for a couple of minutes after cooking. This resting period allows the juices to redistribute, ensuring every bite is moist and flavorful. Serve hot with a side of lemon wedges or your favorite dipping sauce. Enjoy the delightful blend of crisp exterior and succulent interior that makes Hamachi Kama a sought-after dish.
Plating and Serving
After mastering the art of cooking Hamachi Kama to perfection, the final step to delight in this Japanese delicacy is in its presentation and accompaniments. Let’s dive into how we can turn this flavorful dish into a feast for the eyes and the palate.
Side Dish Suggestions
To enhance the dining experience of Hamachi Kama, we recommend pairing it with a selection of side dishes that complement its rich flavor and texture. Here are some of our top picks:
- Steamed Rice: A bowl of fluffy, white rice serves as the perfect backdrop for the savory flavors of Hamachi Kama. It absorbs the delightful juices, making each bite a harmonious blend of flavors.
- Sauteed Vegetables: Opt for a colorful mix of vegetables like bell peppers, broccoli, and carrots lightly sautéed with a hint of garlic and soy sauce. Their crisp texture and vibrant flavors balance the fatty richness of the fish.
- Miso Soup: A comforting bowl of miso soup with tofu and seaweed makes a soothing start or side to the meal. Its umami-packed broth complements the smoky hints of the grilled Hamachi Kama beautifully.
- Daikon Radish Salad: A refreshing salad made with thinly sliced daikon radish, dressed in a light vinaigrette, offers a crisp and cooling contrast to the warm, grilled fish.
- Soba Noodles: Cold soba noodles served with a dipping sauce or dressed with a light sesame dressing can be a delightful, light side that pairs well with the richness of Hamachi Kama.
By combining Hamachi Kama with these thoughtful side dishes, each meal becomes a celebration of textures and flavors, elevating the dining experience to new heights.
Make-Ahead Instructions
When we dive into the world of Japanese cuisine, especially with a delightful dish like Hamachi Kama, we often find ourselves juggling timing and preparation. But fear not, because we’ve got some stellar make-ahead instructions to ensure your Hamachi Kama is not only delightful in taste but stress-free in preparation.
Preparing the Marinade
First things first, let’s talk about the marinade. The rich flavors of soy sauce, ginger, and perhaps a touch of mirin or sake make up the soul-soothing marinade that defines Hamachi Kama. You can prepare this marinade up to two days ahead. Simply whisk together your ingredients in a bowl, cover it, and store it in the refrigerator. This not only saves time but also allows the flavors to meld together beautifully, creating a more profound and complex taste profile.
Marinating the Hamachi Kama
Once your marinade is ready and the Hamachi Kama is at hand, it’s time to let these two become intimate friends. Ideally, marinating should occur at least a few hours before cooking, but for those planners among us, letting the fish collar bask in the marinade overnight in the fridge is even better. This extended marination period allows the Hamachi Kama to absorb all those delicious flavors, ensuring a succulent final dish.
Pre-Prepping the Garnishes
For garnishes, simplicity often reigns supreme with Hamachi Kama. Think thinly sliced scallions, a sprinkle of sesame seeds, or maybe a few lemon wedges to squeeze over the top. These can all be prepared ahead of time — slice your scallions, toast your sesame seeds, and quarter your lemon wedges the day before. Keep them in separate airtight containers in the fridge, and they’ll be fresh and ready to go when it’s time to serve.
Final Thoughts on Advanced Prep
Lastly, if you’re planning to accompany your Hamachi Kama with any side dishes like steamed rice, miso soup, or a daikon radish salad, consider what components of these can also be made ahead. Rice, for instance, reheats wonderfully with a splash of water, and miso soup can be quickly assembled if the broth is pre-made.
Tips for Perfect Hamachi Kama
After mastering the basics of preparing Hamachi Kama, including the make-ahead marinade and selecting the ideal accompaniments, it’s time to focus on refining your skills. The goal is to elevate your dish from simply good to truly magnificent. Here are our top tips for achieving the perfect Hamachi Kama every time.
Select the Best Quality Fish
The journey to a remarkable dish begins at the market. Opt for the freshest Hamachi Kama you can find. The flesh should be pink to white, firm to the touch, and with a bright, clean smell. Freshness is key, as it directly impacts the flavor and texture of your dish.
Perfect Your Marinade
Achieving the perfect balance of flavors in your marinade is crucial. Soy sauce, mirin, sake, and ginger are the pillars of your marinade. Adjust these components to taste, but remember, the essence of this dish lies in its subtlety and balance. Marinate the Hamachi Kama for at least 30 minutes, though a few hours in the fridge can enhance the flavors even more.
Master the Art of Grilling
Grilling is an art, especially when it comes to delicate fish. Preheat your grill to a medium-high temperature to ensure a crisp exterior while keeping the inside juicy. Oil the grill grates to prevent sticking. Place the Hamachi Kama skin side down and let it cook undisturbed until you can see the flesh flake easily. This usually takes about 5 to 8 minutes per side, depending on the thickness.
Broiling as an Alternative
If grilling isn’t an option, broiling is a fantastic alternative that still gives you that delightful char and depth of flavor. Preheat your broiler, place the Hamachi Kama on a foil-lined baking sheet, and position it about 6 inches from the heat source. Keep a keen eye on it, as broiling can quickly turn from perfect to overdone.
Let It Rest
Just as with any other protein, allowing the Hamachi Kama to rest after cooking is crucial. This step ensures that the juices redistribute throughout the fish, making each bite succulent and delicious. A rest time of about 5 minutes should suffice before serving.
Conclusion
We’ve walked through the delightful journey of making Hamachi Kama, from selecting the freshest fish to the final touch of plating. Remember, the secret lies in the balance of the marinade and the finesse in grilling or broiling to perfection. Letting it rest before serving isn’t just a step; it’s the key to unlocking a deeper flavor and a more tender texture. So gather your ingredients and let’s make our next meal not just a dish but an experience. Here’s to many more succulent bites of Hamachi Kama, crafted with love and a dash of culinary artistry.
Related Posts:
- Top Best Vietnamese Coffee Brands: Ultimate Guide & Pairings
- Delight in Healthy French Vietnamese Cuisine: From Pho to Banh Mi
- How to Desalinate Corned Beef: Health Benefits & Techniques
- Ultimate Pate Chaud Recipe Guide: Bake, Store & Reheat Tips
- Ultimate New England Oyster Chowder Recipe & Storage Tips
- Mastering Hamachi Kama: Tips for the Perfect Grilled Yellowtail Collar
- Juicy Teriyaki Pork Belly Recipe: Easy Make-Ahead Tips & Serving Ideas
- Easy Cambodian Beef Jerky Recipe: Marinated & Oven-Baked
- Master Cambodian Noodle Dishes: From Prep to Plate
- Braised Beef Noodle Soup: The Ultimate Guide to Preparation and Storage
- Ultimate Guide to Kasoy Noodle Soup: Recipe, Storage & Reheating Tips
- Ultimate Laap Recipe Guide: From Prep to Perfect Serve
- Ultimate Tapioca Cookies Recipe: Tips for Perfect Texture & Flavor
- Ultimate Hot Cheetos Corn Dog Guide: Recipe, Storage, Reheating
